Nukazuke (Rice-Bran Pickles)

By William Pauley   –   Feast Magazine

Mabel Suen

Nukazuke are Japanese pickles made from a rice-bran pickling bed called nukadoko, which looks like wet sand. (Rice bran is the nutrient-rich outer layer of rice grains.) Nukadoko must be aerated by hand every couple days and topped with fresh rice bran frequently. Chef William Pauley of Confluence Kombucha and The GastroLAB in St. Louis prefers making nukazuke with Korean sea salt; he recommends pickling radishes, cucumber, kohlrabi, apples and celery with it. You can find rice bran at specialty grocery stores, health-food stores or online. Korean sea salt also can be found online.

Recipe by William Pauley, chef-owner, Confluence Kombucha and The GastroLAB in St. Louis

Yields | 6 quarts |

  • 4 lb rice bran
  • 1 lb Korean sea salt or sea salt
  • 24 oz gluten-free beer
  • 2 whole lemon peels
  • 1 Tbsp Thai chile flakes
  • vegetable scraps fruits and vegetables (apples, persimmons, cucumbers, celery, radishes, beets, carrots), for pickling

Preparation | In a large container, mix rice bran, salt and beer until a wet-sand texture forms. Add lemon peel and Thai chile flakes. Smooth out a layer of rice bran in the bottom of container. Layer in vegetable scraps, then more rice bran, then more scraps, and so on. This is the bed you’ll use for pickling later. When you reach the top of the container, pack a final layer of rice bran. Cover and store at room temperature in a dry, dark place for 2 weeks. Aerate daily by stirring and topping with fresh rice bran as mixture becomes wet. Add new scraps every few days. Taste scraps after 2 weeks to determine if bed is properly fermented. If scraps taste raw, they may need to ferment longer; the longer they ferment, the saltier they become. Once nukadoko is ready to produce pickles, add fresh fruit or vegetables. Some might take a few hours to pickle, others overnight. Apples and persimmons take about 1 hour; cucumbers, celery, and small radishes should pickle overnight; and beets, larger radishes, and carrots require multiple days. Rinse pickles in cool water and pat dry before serving.

Let’s Eat: Scotch eggs were the Naked Egg taco of the 18th century

By Bryna Godar   –   The Cap Times

At The Coopers Tavern they serve a “Sconnie Egg,” featuring house-made brat sausage wrapped around a soft-boiled egg, served with a variety of pickles and a beer and mustard aioli ($7).
PHOTO BY MICHELLE STOCKER

Egg wrapped in sausage that’s breaded and deep-fried sounds like a fast-food experiment akin to the Naked Egg Taco, the inside-out Taco Bell invention with a fried egg as the wrap.

In a way, that’s exactly what the Scotch egg is. Food writers dispute the popular snack’s origins, but the upscale English department store Fortnum and Mason claims to have invented Scotch eggs in the 18th century as a portable, ready-to-eat meal for coach travelers.

In other words: fast food.

Scotch eggs are not actually Scottish in origin. Many believe the name stemmed from technique of “scotching,” or tenderizing, the meat.

In U.K. shipyards, these eggs were a working man’s breakfast along with a pint of Scotch ale, according to Peter McElvanna, owner of The Coopers Tavern. In the centuries since, Scotch eggs have become popular pub and picnic fare all over the United Kingdom and beyond.

“I’ve been eating them my whole life,” said McElvanna, who is from Armagh in Northern Ireland.

Scotch eggs can be hard- or soft-boiled eggs wrapped in sausage, coated in breadcrumbs, then baked or fried. They’re typically served sliced in half and accompanied by mustard, pickles or other condiments.

The result is a filling snack or small meal that can be served hot or cold, making Scotch eggs ideal for camping breakfasts, lakeside picnics or late-night beers at a pub.

The basic concept of a Scotch egg allows for ample variation, with some people using quail eggs for smaller serving sizes or opting for different condiments like chili jam. In Madison, a handful of pubs and restaurants offer Scotch eggs with varying types of sausage, sauces and condiments.

At The Coopers Tavern, it’s called the “Sconnie Egg,” featuring house-made bratwurst sausage wrapped around a soft-boiled egg. It’s breaded and fried, then served with a variety of pickles and a beer and mustard aioli ($7).

Sprecher’s Restaurant and Pub also opts for bratwurst, with sauerkraut on the side for a more German take (two eggs, $7.99). Brocach offers a similar riff to Coopers, but with a hard-boiled instead of soft-boiled egg and the addition of stone ground mustard ($5).

My family first encountered Scotch eggs when we lived in Farnborough, England for a year. Fran Griffin introduced us to the dish.

“No matter how many you make, there are never any leftovers,” Griffin told me when I wrote to her on Facebook.

The closest to my family’s Scotch eggs was a version from Flying Hound Alehouse in Fitchburg that uses a coarser ground, spicy Hungarian sausage and a spicy, mildly sweet Dijon style mustard ($5).

Chef Andreas Kammer said the trick to his Scotch eggs is in the breading process. Instead of dropping each coated egg round right in the fryer, he bakes them in the oven before flash-frying.

He said that helps the sausage and egg hold together well and keeps the breading from getting too dark in the oil. The result is a delicious, filling combination, with mild-to-medium heat from the mustard.

Kammer said customers love the Scotch eggs enough that he’s run out a couple times in the past year.

“They’re a high-prep item,” he said. “You have to make a bunch of them at a shot.”

My parents have opted for solely baking their Scotch eggs as an easier and somewhat healthier alternative. We hard boil the eggs and wrap them in mild Italian sausage from Fraboni’s Italian Specialties and Delicatessen on Regent Street, using a generous ratio of about one pound of sausage to six eggs.

Then we roll the balls in store-bought breadcrumbs and bake them at 350 degrees until they’re nicely browned on each side, about 30 to 35 minutes. To make them even crispier, pan fry the egg after baking, turning it to darken each side.

These meaty, satisfying eggs have become a staple of our long hikes, picnics at American Players Theater and neighborhood block parties.

“People do love them,” Kammer said.

Bacon ‘Dog’ with Jalapeño Jelly and Vinegar Slaw

(Mark Boughton Photography/Styling by Teresa Blackburn)

ndrew Zimmern’s catering company, Passport Hospitality, serves this pork-belly version of a hot dog at AZ Canteen locations in Minneapolis. “We’ve been serving that for 15 years, and it’s probably one of our best-selling dishes in our stadium concessions,” says Zimmern. “The slaw, the bacon and the jalapeno jelly is such an awesome trio of elements that go together so well.” To make this at home, you’ll need a large chunk of slab bacon that you can cut into hefty strips. Order it ahead of time from your butcher or online (www.smokehouse.com).

Make-Ahead Tip: Prep the jelly and slaw up to 1 day ahead. Roast the bacon before guests arrive, and sear it just before serving.

Bacon Sandwich with Jalapeno Jelly and Vinegar Slaw

By ANDREW ZIMMERN
  • SERVES 6
  • ACTIVE TIME 
  • TOTAL TIME 

INGREDIENTS

Jalapeno Jelly:

  • ½ cup apple cider vinegar, divided
  • 3 oz jalapeno peppers, stemmed and seeded
  • 1 oz serrano peppers, stemmed and seeded
  • 1½ cups sugar
  • 1 Tbsp pectin powder

Vinegar Slaw:

  • ¾ cup apple cider vinegar
  • 6 Tbsp cup safflower oil
  • 2 Tbsp sugar
  • 2 Tbsp maple syrup
  • 2 tsp fennel seeds, toasted and ground
  • 2 tsp salt, divided
  • 1 tsp dry mustard
  • ½ tsp celery seed
  • 1 lb green cabbage, finely shredded (about ½ head)
  • ¾ cup grated carrot
  • 2 Tbsp minced parsley

Remaining ingredients:

  • 42 oz slab bacon, cut into 6 (7-oz) strips
  • hot dog buns
  • Melted butter

DIRECTIONS

  1.  Combine ¼ cup vinegar and peppers in a blender; puree. In a medium saucepan, combine puree with ¼ cup vinegar and 1½ cups sugar. Bring to a boil; cook 5 minutes, stirring constantly. Gradually whisk in pectin, whisking well after each addition. Cook 1 minute; remove from heat. Skim off any foam. Cool; refrigerate.
  2. To make slaw: In a saucepan over medium heat, combine ¾ cup vinegar, oil, 2 Tbsp sugar, maple syrup, fennel, ½ tsp salt, mustard and celery seed; bring to a boil. Reduce heat and simmer, stirring, until sugar is dissolved. Cool and refrigerate. In a large serving bowl, combine cabbage, carrot, parsley and 1½ tsp salt. Add ½ cup dressing; toss to combine. Add more dressing, if needed, but slaw shouldn’t be soggy.
  3. Preheat oven to 275°F. Place bacon on a rimmed baking sheet; bake 45 minutes. Heat a large cast-iron skillet over high heat; sear bacon 1-2 minutes on each side.
  4. Split buns, leaving them hinged on 1 side. Brush on all sides with butter. Toast or griddle buns. Divide bacon among toasted buns. Spread each with about 2 Tbsp jalapeño jelly. Top each with slaw.

KITCHEN COUNTER

Serves 6.

KEY TAGS

PASTRAMI-SPICED PORK RIBS WITH POTATO SALAD AND PICKLES

Reprinted from Gourmet Traveller

Prok Ribs with Pickles. Photo by BEN DEARNLEY

These pork ribs are marinated and slow-cooked in advance, and the potato salad only improves after a day in the fridge.  All that’s left to do on the day is glaze and heat the ribs.

You’ll need

3 kgAmerican-style pork rib racks125 ml (½ cup)apple cider vinegar, plus extra for brushing60 gmmolasses40 gmDijon mustardWild rocket and sour pickles, to serve Pastrami spice rub2 tbspblack peppercorns2 tbspwhite peppercorns2 tbspyellow mustard seeds2 tbspcoriander seeds3½ tbsp (25gm)smoked paprika1 tspcayenne pepper2 tspbrown sugar Potato salad2 kgchat potatoes, halved100 gmsour cream50 gmmayonnaiseJuice of 1 lemon, or to taste1 tbspapple cider vinegar or a splash of pickling liquid from the pickles½onion, coarsely grated1garlic clove, finely grated½ cupcoarsely chopped flat-leaf parsley

Method

  • 01
  • For pastrami spice rub, crush whole spices and 1 tbsp sea salt with a mortar and pestle, then combine with paprika, cayenne and sugar.
  • 02
  • Brush ribs with a little vinegar, rub all over with spice rub, cover with plastic wrap and refrigerate for at least 2 hours or overnight to marinate.
  • 03
  • Preheat oven to 160°C. Divide ribs between 2 large roasting pans and add 125ml water to each. Cover tightly with foil and roast, swapping trays halfway through cooking, until meat is almost falling from the bone (2-2¼ hours). Cool, and refrigerate for up to 2 days.
  • 04
  • For potato salad, cover potatoes well with cold salted water in a large saucepan, bring to the boil and cook until tender (10-15 minutes). Drain and return to pan. Combine remaining ingredients except parsley in a bowl, season to taste and add to potatoes. Toss to coat, then refrigerate in an airtight container for up to 3 days. Bring to room temperature and toss with parsley to serve.
  • 05
  • Preheat oven to 200°C. Combine vinegar, molasses and mustard in a bowl and season to taste. Divide ribs between 2 large oven trays lined with baking paper, brush with mustard mixture and roast until browned and warmed through (10-15 minutes). Cut racks into ribs and serve hot with potato salad, rocket and pickles.

Traditional fermentation at the heart of Japan’s healthy diet

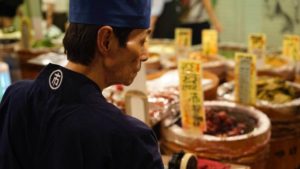
A pickle stall at Nishiki Market in Kyoto.

The practice of fermentation in food can be traced to the very ­beginnings of civilisation when early humans discovered an al­chemy that allowed them to preserve ingredients so they could be eaten year-round. Almost every culture on earth practises fermentation in some way.

But in Japan, fermentation is integral to the food culture, with fermented foods often regarded as the “soul” of Japanese cuisine, and they have been part of the daily diet for centuries.

Beyondtsukemono (pickles, of which there are many types and methods), ingredients like shoyu (soy sauce), miso, umeboshi ­(salted plums), katsuobushi(fermented and smoked skipjack tuna integral to dashi stock), natto(fermented soy beans), sake, mirin, vinegars and amazake are all fermented. Koji (Aspergillus oryzae) is so intrinsic to many of these foods that it has recently been ­declared a national fungus.

Japanese cuisine is often regarded as one of the world’s healthiest, and fermented foods can be credited with playing a significant role in this. Fermented foods (that haven’t been pasteurised) are teeming with probiotics, millions of beneficial bacteria and enzymes that stimulate digestion and improve gut health. They also have positive effects on blood pressure and cholesterol, and some ­experts in Japan believe certain fermented ingredients provide relief from fatigue, anxiety and depression, and even have anti-cancerous properties. In Okinawa, they drink a fermented turmeric tea that is believed to be the key to the incredible longevity of the population.

My fascination with fermentation began in Japan. Five years ago, on my first visit, I found ­myself in a tiny sake bar called Yoramu in Kyoto where they served fresh tofu with a tiny dollop of a chilli paste called kanzuri. It changed my life. I have since ­returned to Japan every year to travel, eat and dig deeper into the incredibly rich culture.

Kanzuri is made in Niigata prefecture, which sits along the Sea of Japan. The climate and “long white winter” there has meant that fermentation and preservation has long been an essential part of the local diet — allowing fruits and vegetables to be eaten year-round. In more recent times — three to four generations — they have adapted their techniques by burying the vegetables in snow houses — called yuki­muro. By doing this they have discovered the natural refrigeration and steady humidity draws out the natural sugars and increases the levels of amino acid. Kanzuri is equal parts hot, salty, citrusy and umami. I have dedicated my life to trying to replicate it.

The following are a few of the ­ingredients, techniques and people I was fortunate to meet on my last visit to Japan, offering a small glimpse into the importance of fermentation in Japanese cuisine.

Sake

Terada Honke is located in the small town of Kozaki in Chiba prefecture, where they have been brewing sake since 1673. Terada Masaru grows his own rice and supplements it with the produce of other small ­organic growers in the area. His naturally brewed sake is completely handmade in the age-old Kimoto method and consists of three ingredients: rice, water and koji. I felt incredibly honoured to visit and learn the process and finish with a sake tasting perfectly matched with fresh tofu from across the road.

Nancy Singleton Hachisu is the author of Preserving the Japanese Way — one of my favourite books. American-born and married to a Japanese farmer, she has lived in rural Saitama for 30 years. It was a real privilege to visit her on her farm and talk preservation and the role of fermented foods in Japan. She also took me to Yamaki Jozo, a local producer of shoyu, miso, tofu and tsukemono.

Yasutaka Kijima is a sixth-­generation koji and miso-maker in Shimizu. His family has been producing in the same location for more than 180 years. As in the case of his forefathers, his is a manual and instinctive operation — his finger is his thermometer. My kind of fermentation.

At Kijima Kouji, koji is made in 100kg batches — some sold in bags (for the price of a packet of crisps) and the rest turned into miso. He sells both from the little shop he runs with his elderly mother. The sad thing is he is the end of the line.

His children aren’t interested in taking over the family business because there’s no money in it. Mass production and changing diets have hit his business hard. His family business will close its doors when he can no longer keep up the significant workload ­required to make ends meet. I was half-jokingly offered an apprenticeship.

Pickles

Shibazuke is my favourite pickle … ever. One of my highlights of the trip was visiting the birthplace of the tsukemono, with all organic ­ingredients grown on site. Tami and Yuto have a beautiful farm nestled in the mountains north of Kyoto. They sell their vegetables at the local farmers market and ferment the significant excess of eggplant, cucumber and shiso the authentic way. The pickle bears little resemblance to the preservative-rich, MSG-laden, luminous purple product readily available throughout Kyoto.

“Shiba” means firewood, and the story goes that back in the day women used to walk 15km each way, sometimes twice a day, with firewood stacked on their heads to sell in Kyoto. They would also fill their pockets with the distinctive pickle to sell or trade to supplement their income. I can only hope the men were being useful.

Sugukizuke is another of the quintessential pickles of Kyoto (along with shibazuke and senmaizuke). Made from a variety of turnip called sugukina, its legitimate production is limited to the area of Kamigamo where it has been made for more than 300 years. Its first recorded history traces its origins to Kamigamo shrine. Gaining access to see it made was a challenge in itself as the families making suguki keep their methodology extremely close to home. I was very lucky to be invited (through friends of friends of friends) to visit master-pickler ­Hajime Watanane, and he talked me though the entire process: from growing the turnips through to the extensive and somewhat complicated fermentation. The results are amazing — crunchy, lactic and so delicious. Again, an entirely different product to what is generally found in the markets.

Soy sauce

Today in Japan only 1 per cent of shoyu is still made the traditional way — not mass produced, and free from the preservatives and flavour enhancers that dominate not only shoyu production but many (once artisanal) fermented foods. Of this 1 per cent, only a handful still use the original cedar barrels (kioke) for fermentation. The ones at Yamaroku on the island of Shodoshima were made in 1868 and hold 6000 litres each. The soy beans are grown on the island and the ­moromi is fermented for between two and four years before being pressed. The recipe has remained unchanged for five generations and, according to present owner Yasuo Yamamoto, “time is the only way to make the best flavour”. The place reeks of umami in a ­really good way.

Fermented sushi

Probably the most fascinating (and challenging) ferment of the trip was fermented sushi — nare­zushi. Sushi as we know it came from fermenting crucian carp in rice, then discarding the rice once the fish was preserved. The practice is believed to have started in the 8th century around lakes Biwa and Yogo in Shiga prefecture.

The tradition was largely abandoned during the Edo era and now lives on via a select few around lake Yogo (about two hours north of Kyoto). Tokuyamazushi is a beautiful restaurant sitting beside the lake surrounded by mountains and forest. Chef Hiro­aki Tokuyama feeds 15 people a day with a set menu highlighting his fermented fish. His process is traditional, using only natural ­ingredients: 12 months salting the fish, then fermenting for between seven and nine months in koji-­inoculated koshihikari rice. He is now beginning to experiment with other (non-lake) fish such as mackerel.

The flavour is intense: very acidic, blue cheesy, yoghurts, fishy. Hiroaki-san serves the fish in the rice it was fermented in, which by this stage has broken down to a thick congee-like consistency — it kind of softens the blow. I initially gagged — but out of respect “took one for the team” and finished not only my portion but also my guide’s and translator’s serves.

While I can’t say I loved it — it was unlike anything I had tasted before — what resonated from the experience was not only that a tradition is being kept alive but that this is now considered one of the greatest delicacies in Japanese cuisine. Tokuyamazushi is one of the hardest restaurants to get a reservation for, and is generally booked out a year in advance.

Adam James (@roughrice) is a cook and fermenter from Hobart. He has just completed a three-month, six-country Churchill Fellowship research trip in search of all things fermented.

Trade talks heat up over jalapeño chiles

Chile growers want to prevent other countries from using the names jalapeño and chipotle.

Jalapeño chiles: Mexico says they’re Mexican.

Another commodity has the potential to apply some heat to trade talks between Mexico and the European Union.  Earlier this month, Mexican cheese makers demanded the right to sell cheese using European names while negotiators from the European Union want designation of origin protection (PDO) — or geographical indication (GI) — for 57 European cheeses.  Now chiles are the focus.

Mexican producers of chile peppers want their own protection for fresh jalapeño chiles and those that undergo smoking, known as chipotles, from the Náhuatl word for smoked chile.

“Turkish and Asian chiles are entering Europe, chiles that have lower quality than ours and that ride the coattails of the popularity of Mexican cuisine,” said the chairman of the National Chamber of the Processed Foods Industry (Canainca).

Chiles from Turkey are sold with a label showing a jalapeño pepper wearing a Mexican hat, explained Jesús Murillo González, but do not state the country of origin. “They’re not saying it’s from here, but they’re riding the coattails of Mexico’s prestige.”

If the protection is granted only Mexican-grown jalapeños and chipotles processed in Mexico will be able use those names.

Murillo explained that the defense of Mexican chiles focuses on japaleños and chipotles because they’re the two kinds with the highest market impact.

Mexican chiles represent a market of just over 7 billion pesos (US $376 million) annually, most of them being either fresh jalapeños or processed chipotles.

Trade talks will continue on February 5 in Brussels, Belgium.

Mexican exports to the European Union are about $19 billion, a fraction of trade with the United States, which is estimated to have been $302 billion last year but has been under threat from protectionism in the U.S.

Roasted Cauliflower Soup with Fried Jalapenos

GLUTEN FREE· MAIN· PALEO· RECIPES· SIDES· SOUPS & STEWS· VEGAN· VEGETARIAN

Reposted from Isabel Eats

This Roasted Cauliflower Soup with Fried Jalapeños is thick, creamy and loaded with healthy veggies. It’s also gluten free, paleo, vegetarian and vegan!

Roasted Cauliflower Soup with Fried Jalapenos

If you’re looking to sneak in some vegetables into your diet, pureed soup recipes like this cauliflower soup are your best friend.

Made with two big ‘ol heads of roasted cauliflower, onions, garlic, dried sage and more, a serving of this soup is full of fiber, vitamin C, vitamin A and all the good stuff we get through food. And to give it that little Mexican inspired touch, I just haaad to mix in some fried jalapeños. I couldn’t help myself.

I have been absolutely obsessed with making pureed soups lately. Part of it is because they’re super easy to make and another part is because they’re often full of veggies and pretty healthy.

But let’s be honest – it’s mostly because it’s cold outside and I like eating soups when it’s freezing. Nothing to do with health, nothing to do with how easy it is, everything to do with wrapping my hands around a warm bowl of soup to keep them warm.

Does that make me a bad food blogger? ????

Luckily, this recipe is pretty damn healthy, full of veggies, warm and comforting AND freaking tasty. It’s a win win!

To get this soup thick and creamy, I used 2 full heads of cauliflower instead of using any common thickeners like cornstarch or arrowroot powder. Those things are bad at all, but I wanted to fit in as many veggies as possible.

To bring out the best cauliflower flavor, I roasted it in the oven until it softened and started to get all those juicy brown bits. Roasting cauliflower is my absolutely favorite way of eating the cruciferous veggie, and I highly recommend it. Just look at this Spicy Chipotle Roasted Cauliflower recipe!

Once you roast veggies, you’ll never go back.

Once the cauliflower is nice and roasted, I sauteed some garlic and onions until beautifully fragrant and translucent. Then add in the cauliflower to the same pot along with some sage, broth and a bay leaf. Bring everything to a boil, cover and simmer for 5 minutes.

Then comes the fun part – pureeing everything! If you want everything as smooth as can be, I recommend transferring the soup to a blender and blending until smooth. You may have to do it in two batches because you don’t want the soup to overfill and explode in the blender. That would not be good.  Here is a link to the exact blender that I use and love. It gets everything silky smooth and isn’t as expensive as a Vitamix.

If you want your soup more chunky, almost like a chowder, I recommend using an immersion blender like this one. I love using my immersion blender if I can because clean up is a breeze compared to all the other options. And I’m always looking for a way to reduce the amount of dishes I have to do!

Once everything is nice and blended, mix in some milk (I used almond milk to keep this recipe paleo and vegan, but you can use regular cow’s milk if that’s what you have) and some fried jalapeños. If you leave in some of the veins and a seeds when frying the jalapenos, they give the soup a nice little kick, but if you don’t want anything spicy, you can leave them out. It’s up to you.

COMMONLY ASKED QUESTIONS

Can this cauliflower soup be frozen?

It depends. I don’t recommend freezing soups that have milk in them, even if it’s almond milk. I find that the milk separates a little bit and becomes too “watery.” However, if you plan on freezing it, you can leave out the almond milk, freeze it and mix it in when you’re ready to eat.

Is this soup spicy?

No. If you devein and remove the seeds from the jalapeños, this soup isn’t spicy at all. If you’d like it to have some heat (like me!), feel free to leave in some veins and seeds when frying.

Roasted Cauliflower Soup with Fried Jalapenos
Prep Time
15 mins
Cook Time
1 hr
Total Time
1 hr 15 mins

This Roasted Cauliflower Soup with Fried Jalapeños is thick, creamy and loaded with healthy veggies. It’s also gluten free, paleo, vegetarian and vegan!

Course: Soup
Cuisine: Mexican
Servings4 servings (1 1/2 cups each)
Calories249 kcal
AuthorIsabel Eats
Ingredients
  • 2 heads cauliflower, cut into florets
  • 4 tablespoons olive oil divided
  • 1 pinch salt
  • 1 pinch black pepper
  • 3 jalapenos, seeded and deveined (or you can leave in the veins and some seeds for a little heat)
  • 1 large onion, diced (about 1 1/2 cups)
  • 1 tablespoon minced garlic
  • 2 1/2 cups broth (vegetable or chicken)
  • 1/2 teaspoon dried sage
  • 1 dried bay leaf
  • 1 1/2 cups unsweetened plain almond milk
  • garnish: fried jalapenos, feta cheese, black pepper
Instructions
  1. Preheat oven to 425 degrees F. Spray a baking sheet with cooking spray.

  2. Place cauliflower onto the prepared baking sheet in a single layer. Add 2 tablespoons of olive oil and a pinch of salt and pepper. Mix together to combine and roast in the oven for 35 minutes.

  3. In a large dutch oven or pot over medium-high heat, add 1 tablespoon of olive oil. And in jalapenos and fry for 3 to 5 minutes, until the edges start to get crispy. Transfer the jalapenos to a bowl and set aside.

  4. Remove jalapenos from dutch oven and transfer to a bowl. Set aside.
  5. In the same dutch oven or pot, add in the remaining 1 tablespoon of olive oil. Add the onion and garlic, Cook, stirring occasionally, for 5 minutes, until the onions starts to become translucent.

  6. Add in the roasted cauliflower, broth, sage and bay leaf. Bring the soup to a boil, cover and simmer for 10 minutes.

  7. Turn off the heat, remove the bay leaf and puree the soup with an immersion blender or regular blender until smooth.

  8. Pour in the milk and 2/3 of the fried jalapenos. Mix everything together and season with more salt if needed. If the soup is too thick, feel free to add in more broth until it’s just how you like it.

  9. Serve in soup bowls and garnish with the remaining fried jalapenos and feta cheese.


*Nutritional information does not include feta cheese.


Nutrition Facts
Roasted Cauliflower Soup with Fried Jalapenos
Amount Per Serving (1.5 cups)
Calories 249Calories from Fat 135
% Daily Value*
Total Fat 15g23%
Saturated Fat 2g10%
Polyunsaturated Fat 2g
Monounsaturated Fat 11g
Potassium 876mg25%
Total Carbohydrates 25g8%
Dietary Fiber 10g40%
Sugars 14g
Protein 9g18%
Vitamin A21%
Vitamin C400%
Calcium27%
Iron13%
* Percent Daily Values are based on a 2000 calorie diet

Dagwood’s in Vero Beach delivers big on flavor, quality and friendliness

By Maribeth Renne, Special to TCPalm

Dagwood’s Deli and Sub Shop’s signature club sandwich is a soft roll loaded with fresh ham, turkey, roast beef, bacon, cheddar and provolone with lettuce, tomato and onion and additional toppings such as pickles, banana peppers, black olives and, jalapenos, if you like. (Photo: MARIBETH RENNE/SPECIAL TO TCPALM)

Make sure you also try the Philly cheese steak dip, an excellent sandwich loaded with tender, perfectly seasoned eye prime beef and sautéed onions, peppers and mushrooms and a layer of melted provolone cheese. It comes with a cup of beef au’jus for added flavor.

Dagwood’s makes tuna salad just the way I like it, nicely seasoned with just the right amount of mayonnaise. Tuck a large serving of this delicious tuna salad into a soft roll, add lettuce, tomato, onions, pickles and salt and pepper and you have a divine tuna salad sub.

The sophisticated California club is a nice sandwich with turkey, bacon, provolone, avocado, mayonnaise, honey mustard, tomato, onions and lots of alfalfa sprouts. We enjoyed trying it.

And thank goodness it has a veggie sub for our vegetarian guest who enjoyed the alfalfa sprouts, lettuce, tomato, onions, pickles, black olives, cucumbers, green peppers and avocado spiced just right in a soft sub roll. In retrospect, she wished she had asked for a cheese to be added but enjoyed the sandwich as offered.

And if you prefer white or wheat sub roll, sliced white, wheat or rye bread or a wrap, just make that request for an easy substitution. Like it toasted? Dagwood’s will do that as well.

If you wish to go bread-less, no worries. Dagwood’s offers any sub made as a salad for the same price as the sub.

Dagwood’s is a simple little shop but delivers big on flavor, quality and friendliness.

Maribeth Renne dines anonymously at the expense of Treasure Coast Newspapers for #TCPalmSocial. Contact her at maribeth.d.renne@gmail.com or follow @mebpeb on Twitter.

Dagwood’s Deli and Sub Shop

Cuisine: Sandwich shop
Address: 835 17th St., Vero Beach
Hours: 11 a.m.-3 p.m. Monday-Saturday
Phone: 772-778-1900
Alcohol: Beer and wine
Website: www.dagwoodsvb.com

Here’s how to make a Closed-On-Sunday Chicken Sandwich

By SHARON LITTE • Times News 

“Why question the chicken crossing the road? Seems a bit judgmental.” — said me just now

Wildflour’s Cottage Kitchen
Try this recipe the next time you are craving a plain chicken sandwich with extra pickles on a Sunday.

I currently reside in this little village called Nashville. You’ve probably heard of it. Nashville is well known for quite a few things. Country music, honky-tonk bars and hot chicken are some of our shiny attributes and never fail to impress locals and tourists alike.

Hot chicken is and always has been a big deal here. I could go into the history, but my short attention span and the conflicting stories lead me to one conclusion concerning its origin. A really good cook got really mad at her significant other and loaded his chicken dinner with enough cayenne pepper to make him think twice about doing that again. Whatever THAT was. Short story — he loved it! Maybe that revenge should have been served cold.

I have enjoyed all of the local establishments that feature hot chicken, but occasionally I just want a plain chicken sandwich with extra pickles and some waffle fries. Unfortunately, this craving usually happens on Sunday. It’s a sad, sad story.

The recipe that I’m sharing comes very close to replicating this particular sandwich, and I hope you enjoy it on any given weekday. Eat more chikin. Cheers!

Ingredients:

4 chicken breasts (boneless and skinless)

1 16-ounce jar dill pickle chips

2 cups water

5 1-ounce packets Hidden Valley Ranch salad dressing mix

1/4 cup sugar

2 T. powdered sugar

3 T. salt

1 cup all-purpose flour

2 tsp. black pepper

4 T. butter

2 T. honey

4 sandwich buns

Dukes mayonnaise

Peanut oil for frying

For the brine:

Strain the pickles over a large bowl and set pickles aside. Add water to the pickle juice and whisk in four packets of the dressing mix, sugar and 1 T. of the salt. Pour this brine into a large zip-top bag and add chicken. Refrigerate up to three hours.

Heat oil in deep fryer to 330 degrees F. Line a baking sheet with paper towels and top with a cooling rack.

In a medium bowl, whisk flour, powdered sugar, remaining seasoning packet, salt and pepper.

Pull chicken from the brine and coat in flour mixture. Let sit on rack for about five minutes then dredge in flour again.

Deep fry breasts about eight to 10 minutes until no pink remains. Transfer chicken to a clean rack to cool.

For the buns:

Heat butter and honey in a small saucepan until combined then transfer mixture to a large skillet. Over low heat, toast the split buns in the honey butter.

Spread the bottom with mayonnaise, top with chicken breast, dill pickles and close the sandwich with the top bun.

Sharon Little is a community contributor for the Kingsport Times-News.

Don’t get in a pickle with preserving, says chef Jamie Scott

by Jamie Scott   –   The Courier

Meat and Pickle Board

At the restaurant fermentation and preserving are just as important to us as local sourcing and seasonal cooking, says Jamie Scott, chef patron of The Newport.

That’s  because, in my opinion, it enhances certain foods by manipulating and prolonging its existence.

A combination of both preservation and fermentation – and probably the most in demand just now – is sourdough (levain) bread, perfect topped with anything from cultured butter to a little bit of pate to be spread over and devoured in one bite.

My interest in these methods was first aroused by my parents’ love for pickled onions. They would always go for the large onions in the tastiest malt vinegar that would make a camel’s eyes water after one bite, even in the middle of the Sahara.

“Now those are pickles,” Dad would say, and they were fine. But when I finally tasted a real pickle, the kind made the old-fashioned way, fermented with nothing more than salt, water and thyme, I realised what I’d been missing. A vinegary pickle ploughs through your palate (often in a pleasing way) but a live cultured, salt cured, fermented pickle tells a more multifaceted story.

It’s sour, to be sure, but it tastes of something more something elusive – it’s the flavour of middle Europe captured in one bite.

When I started cooking for a living, I realized that the complexity I’d tasted in that pickle is the hallmark of well-made fermented food, which include some of my very favourite things to eat and drink – pickles, aged cheeses, tangy sourdough, spicy kimchis, tart yogurts, winey salamis and of course wine itself.

I’m not short of volunteers in the kitchen to start fermentation projects we are all love trying out a new sauerkraut recipe or getting stuck into a fresh batch of new season carrots from the local farm along the road. Making our own yoghurts and skyr seemed like kitchen magic the way it so effortlessly soured and thickened overnight.

Nurturing live cultured foods, watching their colours change and tasting the results is so incredibly satisfying and I would urge anyone to give it a go.

Chef’s tip

Try my super easy and delicious pickle recipe which will kick start your love for pickling and preserving. Put 200ml white wine vinegar, 200ml water, 100g caster sugar, 1 tsp pink peppercorns, 1 bay leaf and 2 sprigs of thyme in a pan and bring to the boil, cool to room temperature ready to use.

Take any of your desired vegetable, peel or give them a really good wash, pop into a kilner jar and cover with the pickle liquor. Pop a wee bit of greaseproof paper as a small weight to keep everything fully submerged. Leave for as long as desired, but initially a minimum of two to three weeks.