Recipe: Zesty Carrots, Hot Peppers and Shallot Stir-Fry

Only 86 calories per serving!

By 

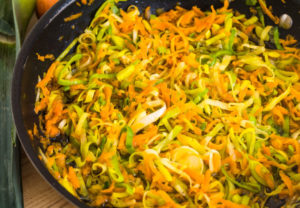
Stewed leek and carrot slices in frying pan with jalapenos and vegetable oil on the wood table

This quick and simple recipe is the perfect vegetable side dish that uses jalapenos to spice up any meal. The jalapenos, ginger and garlic are especially aromatic as you cook.

Ingredients

1 tablespoon extra-virgin olive oil
4 cups carrots, sliced
3 shallots, sliced into thick rings
2 garlic cloves, minced
1 1/2 teaspoon fresh ginger, peeled and minced
1/2 jalapeno, stemmed, seeded and minced
1/2 teaspoon Chinese Five Spice
1 teaspoon sea salt
1/4 teaspoon red pepper flakes
2 green onions, thinly sliced

Directions

  1. Mince the jalapeños, ginger and garlic. Slice the shallots into rings.
  2. In a large sauce pan heat olive oil over medium-high heat and add the carrots and shallots.
  3. Sauté for 4 to 5 minutes, then add the garlic, ginger, jalapeños, Chinese Five Spice, salt and red pepper flakes.
  4. Sauté for 4 to 5 more minutes and add the green onion to finish. Carrots should be tender but still crisp in the center.

Chef’s notes: If Chinese Five Spice is not available, you can simply leave it out. However, if you can find this seasoning, it adds a flavorful touch to the dish. To peel ginger quickly and safely use the edge of a small spoon and scrape the peel away from the ginger root to remove all the skin before chopping.

Nutrition information

Each serving (1/4 of dish) contains:

Calories 86
Fat 4g
Saturated fat 0g
Cholesterol 0mg
Fiber 2g
Protein 1g
Carbohydrate13g
Sodium 346mg

Sweet and Sour Onion Pickle

By Deb Lindsey   –   The Washington Post

Deb Lindsey for The Washington Post
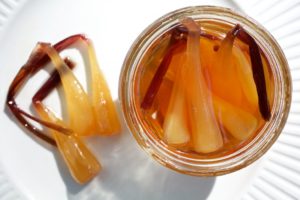
Sweet and Sour Onion Pickles

Use this onion pickle as a condiment on a sandwich or added to cheese or eggs. Use the first onions of spring, not grocery store scallions.

You will need 1 quart of non-chlorinated water and 2 half-pint canning jars with rings and new lids; see the NOTE, below.

Substitute 24 ramps or wild garlic, or combine all three, pickling only the bulbs. What about the greens or scapes that remain? Chop them and wilt in olive oil over high heat, and add to a frittata or Spanish tortilla.

Make Ahead: The onions need to marinate twice – once in salt water for 12 to 24 hours and once in the pickling brine for 12 to 24 hours. The canned onion pickle needs to cure for 2 weeks before serving. Unopened jars can be stored in a cool, dark place for up to 1 year.

SERVINGS:

Tested size: 12 servings; makes 2 half-pint jars

INGREDIENTS
  • 2 tablespoons kosher salt
  • 8 to 12 plump spring onions (about 12 ounces total), extremely fresh and very clean
  • 3 cups apple cider vinegar
  • 2 cups sugar
  • 1 tablespoon pickling spice

DIRECTIONS

Fill a stainless-steel or glass bowl with 1 quart of cool, non-chlorinated water. Stir in the salt. Closely trim away the roots from the end of each onion, then cut off the greens. Add the onions to the salt water; top with a plate to keep them submerged. Drape the bowl with a tea towel and let it rest for 12 to 24 hours.

Drain the onions, rinse well under cool running water, then drain again.

Combine the vinegar, sugar and pickling spice in a nonreactive (stainless-steel) 3-quart saucepan; bring to a boil over medium-high heat, stirring until the sugar has dissolved and formed a light syrup. Add the onions; once the syrup returns to a boil, cook for 10 minutes. Remove from the heat, cover and let the mixture rest in the saucepan for 12 to 24 hours.

Prepare for water-bath canning. Bring the onions in the syrup to a rolling boil over high heat. Use a slotted spoon to lift the onions out of the syrup and pack them into the sanitized jars, filling each jar no more than two-thirds full. Boil the syrup for 5 minutes, until slightly thickened.

Add the thickened syrup to the jars, leaving 1/2 inch of head space. (You might have syrup remaining; it makes a sinful addition to a gin cocktail and a surprising sip over ice with sparkling water.)

Run a chopstick or flat plastic knife along the inside of the jars to dislodge any air bubbles. Clean the rim of each jar with distilled white vinegar to cut residual oils, place the warmed lids on and finger-tighten the rings (not too tightly). Process in the boiling water bath for 15 minutes (see NOTE, below). Turn off the heat and let the jars rest in the pot for 10 minutes. Use a jar lifter to transfer the jars to a clean, folded dish towel to cool for several hours.

Label and date the sealed jars. Store in a cool, dark place for up to 1 year. Let the onions cure for at least 2 weeks before serving, during which time any of their sharp flavor that remains will mellow.

NOTE: Water-bath canning safely seals high-acid, low-pH foods in jars. The time for processing in the water bath is calculated based on the size of the jar and the consistency and density of the food. For safety’s sake, do not alter the jar size, ingredients, ratios or processing time in any canning recipe. If moved to change any of those factors, simply put the prepared food in the refrigerator and eat within a week.

Fill a large canning kettle or deep stockpot two-thirds full with water. To keep the jars from rattling against the pot, place a rack in the pot. (A cake rack works well; a folded dish towel is equally effective.) Sanitize the jars in a short dishwasher cycle or by boiling them in a canning kettle or pot for 10 minutes. Fill a small saucepan with water and add the rings. Bring to a boil over high heat, slip in the lids and turn off the heat.

Use a jar lifter or tongs to lower the filled, sealed jars into the boiling water bath, keeping them upright. When all of the jars are in place, the water should be 1 to 2 inches above the jar tops. Add water as needed. Bring the water to a low boil before starting the timer for processing.

At the end of processing, turn off the heat and let the jars sit in the water bath until the boiling has stopped. That will reduce siphoning, in which the food burbles up under the lid, breaking the seal. Use the jar lifter or tongs to transfer the jars to a folded towel, keeping them upright. Leave the jars until they have completely cooled, at least 12 hours. Remove the rings and test the seal by lifting each jar by the lid. The lid should hold fast. Label and store in a cool, dry, dark space.

Spicy Whiskey BBQ Sliders

By Ree Drummond   –   Today.com

Nathan Congleton / TODAY
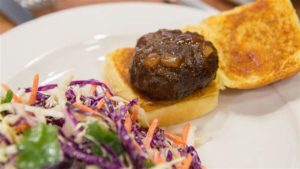
These BBQ Sliders use pickled jalapeno slices to spice them up.

COOK TIME:

PREP TIME:

YIELD:

12 sliders

These sliders are slightly spicy thanks to the jalapenos, really flavorful and delightfully messy. They are great when there’s a big game on TV or if you find yourself suddenly with a houseful of hungry men. They’re slightly spicy, incredibly flavorful, and super messy in a wonderful way! The little jalapeño slices absolutely make the dish.

Technique tip: Turn off the open flame before pouring in the whiskey!

Swap options: You can use ground turkey instead of beef. Instead of making sliders, make meatballs and serve with toothpicks instead of buns.

Ingredients

    • 2 pounds ground beef
    • Salt and freshly ground black pepper, to taste
    • 4 tablespoons salted butter, plus more for buns
    • 1 large onion, diced
    • 1/2 cup whiskey
    • 1/4 cup jarred jalapeño slices, plus more to taste
    • 1 cup barbecue sauce
    • 12 slider buns, split

Preparation

1. Form the meat into 12 miniature patties and season them with salt and pepper on both sides. Melt the butter in a large skillet over medium-high heat and cook the patties until just about done in the middle, approximately 3-5 minutes per side. Remove from the skillet and set aside. Drain off all but 2 tablespoons of grease, then return the skillet to the stove.

2. Add the diced onion to the skillet and cook over medium-high heat, stirring, about 3 minutes.

3. Turn off the flame and pour in the whiskey. Turn the flame back on to medium heat, stir, then allow the whiskey to reduce by half, 2-3 minutes. Stir in the jalapeños and the barbecue sauce. Reduce the heat to low and place the patties in the barbecue sauce, turning to coat. Allow the patties to simmer in the sauce until everything is hot and bubbling. Season with salt to taste.

4. Lightly butter and toast the buns. Serve the sliders on the buns with extra sauce on the side.

Recipe: Pimento Cheese Jalapeño Beef Burger

By Shannon Weber   –   St. Louis Post-Dispatch

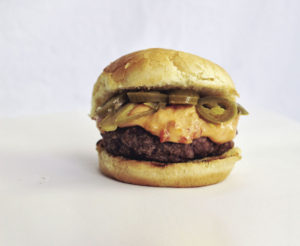
Pimento Cheese Jalapeño Beef Burger

Serves | 6 |

If you prefer a slightly smoother texture to your pimento cheese, skip the hand-mixing and instead pulse in a food processor to blend.

Pimento Cheese

  • 8 oz block sharp cheddar cheese, grated (do not use pre-grated cheddar)
  • 1/4 cup cream cheese, at room temperature
  • 1/4 cup mayonnaise
  • 3/4 tsp kosher salt
  • 1/2 tsp chile flake
  • 1/2 tsp onion powder
  • 1/2 tsp worchestershire sauce
  • 1/2 cup pimentos, drained (7 oz jar)

Jalapeño Beef Burgers

  • 2 lbs ground chuck, near room temperature
  • 1/4 cup vegetable or grapeseed oil
  • 6 hamburger buns, split
  • 3 Tbsp salted butter, melted
  • 1 jar pickled jalapeños, drained
  • kosher salt and fresh ground black pepper

Preparation – Pimento Cheese

Stir all ingredients but pimentos together in a large bowl until well combined. Add pimentos and stir until evenly distributed. Transfer to glass jar, seal and refrigerate for at least 1 hour or until ready to use.

Preparation – Jalapeño Beef Burgers

Prepare grill for high heat; clean and oil grates. Divide ground chuck into 6 equal portions and pat firmly into patties, making a depression in the center of each. Brush burgers on one side with oil, season with salt and pepper, and place on grill. Cook 5 minutes. Brush with oil, season the top and flip; cook for 3 to 4 minutes longer. During the last 1 to 2 minutes of cooking, scoop pimento cheese on top of each burger and close grill lid to melt. When cheese has melted, remove from grill, brush bun halves with butter and grill until toasted.

To Serve

Place burgers on buns, top with pickled jalapenos, and serve immediately.

Balsamic Jalapeño Grilled Steak

  • From inmamamaggieskitchen.com

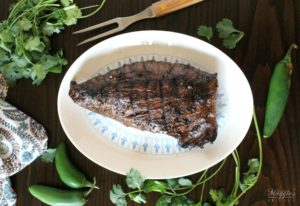
Balsamic Jalapeno Steak

2 pounds steak

1/4 cup balsamic vinegar

2 tablespoons olive oil

2 jalapeños, finely diced

1/4 teaspoon black pepper

5 cloves of garlic, finely diced

Trim any visible fat. Place steak in a resealable plastic bag. Add all the ingredients. Turn to coat all sides of the meat with the marinade. Let sit in the refrigerator for at least 4 hours. Overnight is best. When ready to cook, take the meat out of the refrigerator. Heat the grill to 350-375 degrees, medium heat. Cook for 10-15 minutes on each side, depending on the thickness of the meat. Meat is done when the second side “bounces back” or the internal temperature 145 degrees for medium rare, 160 degrees for medium, 175 degrees well done. Let meat rest for 10 minutes in a foil tent before slicing.

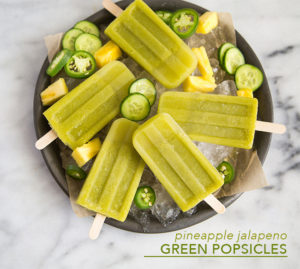
PINEAPPLE JALAPENO GREEN POPSICLES

posted by MARYANNE CABRERA   –   The Little Epicurean

Pineapple Jalapeno Popsicles – the Perfect Adult Popsicles

Try these pineapple jalapeño green popsicles!

I first made these popsicles last month for The Chalkboard.  These green jalapeno popsicles are the perfect combination of spicy and cool.  They’re super refreshing and one of the easiest treats to make.  Just 3 ingredients!  You don’t need any fancy popsicle molds, paper cups or freezer safe glasses and containers work just as fine.  You can even freeze them in ice cube trays and blend them into wonderfully delightful slushies.

I’m so happy to have a Pressed Juicery location within 2 miles of my house.   I used a bottle of their kale/romaine/spinach/yuzu/pink lady apple/cucumber/jalapeño blend.  It’s a seasonal blend so get them fast while they’re still available.  But don’t worry, any kind of green juice would work just as well.  I added fresh pineapple and mango to thicken the juice.  The added fruits help to give the popsicles a little more texture and body.

Beat the remaining hot days with this healthy treat!

PINEAPPLE JALAPEÑO GREEN POPSICLES

yield: MAKES 10 POPSICLES

prep time: 5 MINUTES

cook time: 5 HOURS

total time: 5 HOURS 5 MINUTES

INGREDIENTS:

DIRECTIONS:

  1. In a blender (or food processor) combine juice, pineapple, and mango.  Blend until smooth.
  2. Pour mixture into popsicle molds.  Place filled molds in the freezer for 1 hour.  Remove and insert wooden sticks into molds.  Return mold to freezer and freezer for at least 4 hours, until firm.


The Homemade Pickle Popsicle Recipe You Need This Summer

By Beth Lipton

Homemade Pickle Popsicles are great for summer!

These days, you can find fancy ice pops at your local farmer’s market or grocery store in countless flavor combinations, and it’s not uncommon to see popsicles infused with everything from lavender to matcha to mint. One flavor you probably haven’t yet tried? Pickle juice popsicles.

Hear us out: Pickle juice is delicious and readily available, of course. And it contains electrolytes, which may help boost hydration, especially during the hot summer months. For additional health perks, opt for fermented pickles, such as Bubbies (not all store-bought pickles are fermented; some are soaked in brine). Research has suggested that fermented foods such as pickles, miso, and tempeh may help boost immunity.

One concern about using pickle juice in this way is that it can contain a lot of sodium, so we added fresh cucumber to make the recipe more hydrating (cucumbers are more than 95% water). The result is an easy-to-make, slightly tangy, refreshing, and unexpectedly delicious summer treat.

Pickle Popsicles Recipe

Yield: 2 1/2 cups of liquid, or approximately 6 popsicles

1 English cucumber (about 15 oz.), peeled, seeded, chopped
1 cup pickle juice
1/4 tsp. honey, optional

  1. Combine cucumber and pickle juice in a high-speed blender and blend until smooth.
  2. Taste and season with honey (optional).
  3. Pour into ice-pop molds and freeze.

You will need popsicle molds in order to make this recipe. I like Zoku Mini Pops Mold ($17; bedbathandbeyond.com). Don’t have pickle juice on hand, or want to try a different flavor? Sauerkraut juice would work well, too—you can use actual juice drained from fermented sauerkraut, or buy bottled sauerkraut juice

Quest for a missing recipe sends Spokane man in search of grape vodka and jalapeños … in a beverage

By Adriana Janovich

adrianaj@spokesman.com

(509) 459-5446


Reader Rod Rodrigues created this boozy beverage after trying to track down a similar recipe by calling The Spokesman-Review Food section.

One would think it would be easy to find using the search terms “grape vodka” and “jalapeño” or “muddled jalapeños.”

But, there was no luck looking in the newspaper archives.

So, a short time later – and after some experimenting – Rodrigues crafted this drink in honor of the one for which he has lost the recipe.

“You’ll soon discover why I call it Fire and Ice,” he said. “Make it! You’ve never had anything like it.”

Grape Vodka & Jalapenos?

Fire and Ice

From Rod Rodrigues

1 slice jalapeño or Serrano pepper

1/2 ounce simple syrup

1/2 ounce lime juice

1 dash orange bitters

2 ounces grape vodka

Place pepper slice and simple syrup in a shaker 1/4-filled with crushed ice. Muddle. Add the rest of the ingredients. Shake. Strain into coupe or Martini glass.

Papendieck Mustard Pickles

Reprinted from the Milwaukee Wisconsin Journal Sentinel article at www.jsonline.com.

From store receipt to the walls of their kitchens

Sophie Papendieck, born in 1876,was known for these mustard pickles; the family believes they were sold in the meat market owned by her husband, William, in Sheboygan. The family lived above the store, where they raised their six children.

Lisa Gutoski of Sheboygan got the recipe from her 85-year-old mother, Patricia Papendieck, whose husband was Sophie’s grandson. The recipe was written by Sophie on a store receipt.

“My Dad, William Papendieck, was very proud of his heritage and this recipe,” Gutoski wrote. “One year for a Christmas gift he decoupaged a copy of this original pickle recipe onto bread boards and gave them to all 10 of his children (yes, 10 kids!). This bread board now hangs proudly in all of our kitchens.”
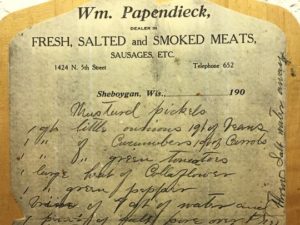
Sophie Papendieck recorded her mustard pickle recipe on a store receipt. (Photo: Courtesy of Papendieck family)

The recipe here was fleshed out from the original, which had very little in the way of instructions. It was also safety-checked and further revised for us by master preserver Christina Ward, who additionally cautions: “When making pickling solutions, always cook with the lid on the pot. Evaporation will cause the solution to go out of balance and become too salty, too sweet, or too sour.”

Makes 12 to 16 pint jars

Cucumber brine solution:

  • 4 quarts water
  • 2 cups 100% pure salt (see note)
  • 1 quart sliced unpeeled cucumbers

Vegetable brine solution:

  • 2 quarts of water
  • 2 teaspoons 100% pure salt

Vegetables:

  • 1 quart peeled, pearl-size white onions (can substitute chopped white onion)
  • 1 quart chopped green beans
  • 1 quart chopped peeled carrots
  • 1 quart chopped green tomatoes
  • 1 large head of cauliflower, cut into small florets
  • 1 large green bell pepper, chopped
  • (Note: All vegetable pieces should be uniformly cut to approximately ½-inch pieces)

Pickling solution:

  • 2 quarts white distilled or cider vinegar
  • 3 ½ cups sugar
  • 6 tablespoons ground mustard powder
  • 1 ½ tablespoons ground turmeric

Prepare cucumber brine solution in a large, non-reactive bowl. Place cucumbers into brine solution. Cover bowl with a light kitchen towel. Set aside on kitchen counter or table for 24 hours.

In a large, non-reactive stockpot, mix water and salt for vegetable brine solution. Stir over medium heat until salt is dissolved and solution begins to boil. Cover pot and remove from heat.

Place chopped vegetable mix in a large, non-reactive stockpot. Pour heated vegetable brine solution over vegetables. Bring to a boil over medium-high heat. Remove from heat, drain, and set vegetables aside.

Remove cucumbers from brine solution.

Make pickling solution: In large non-reactive stockpot, combine vinegar, sugar, mustard and turmeric. Bring to a boil while covered over medium heat, making sure that sugar is dissolved.

Remove from heat. Add cucumber slices and drained vegetables.

Ladle vegetable and pickling solution mixture into 12 to 16 clean pint canning jars. Add extra pickling solution from the pot to ensure that vegetables are completely covered and within the required ½-inch headspace. Poke down into jars to remove bubbles.

Put on lids and process in hot water bath 20 minutes.

Wait three weeks before using.

Note: Canning, kosher or sea salt all can be used — just be sure the label says 100% salt. Do not usetable salt.

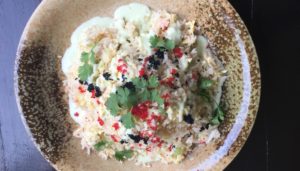
King Crab Fried Rice

By Dale Talde   –   The Splendid Table

Talde Brooklyn
Jalapenos bring this dish some welcome heat.

This recipe was included The Key 3 segment that host Francis Lam recorded with Dale Talde at his restaurant Talde Brooklyn.

Ingredients

  • 3oz king crab, picked
  • 2 Tbsp shallots, minced
  • 2 Tbsp celery, diced
  • 1/2 cup egg, scrambled
  • 1 tsp salt
  • 4 cups cooked rice
  • pinch white pepper
  • cilantro
  • red tobiko (optional)
  • black tobiko (optional)
  • Jalapeño Aioli (recipe below)
  • 6 slices Pickled Jalapeño (recipe below)

Directions

In a very hot pan, add 2 Tbsp of vegetable or corn oil, add celery, shallot, and pickled jalapenos, sweat until shallot is translucent.

Add scrambled egg, cook to a soft scramble, then add rice, crab meat, salt, and pepper.

Stir Fry for 3 mins on high head.

On a plate, place some Jalapeno Aioli on the bottom, transfer fried rice, and a bit more aioli on top.  Garnish with red and black tobiko (optional), and cilantro.

Jalapeño Aioli

  • 1 cup oil
  • 1/4 cup egg yolks
  • 1 Tbsp white vinegar
  • 1 oz fish sauce
  • 4 raw jalapeño (2 seeded, 2 not seeded)

In a robot coupe add egg yolks and vinegar and slowly drizzle in oil. Season with fish sauce.

Pickled Jalapeño

  • 10 jalapeños, sliced
  • 1 qt vinegar
  • 2 Tbsp sugar
  • 1 tsp salt

Mix all and pickle overnight.