Jalapeno Marinated Chicken Breast

By: FOX4News.com Staff

Chef Tre Wilcox with Tre Wilcox Cooking Concepts shares the recipe for a great post-workout meal.

Jalapeno Marinated Chicken

3/4 cup olive oil
3 each jalapeno chile
12 each garlic cloves
3 peeled shallots
1 each bunch cilantro, washed
2 tablespoons cumin seeds
2 teaspoons lime juice
2 teaspoons cracked black peppercorns
4 piece boneless skinless chicken breast

Preparation Place chicken breast into a ziplock freezer bag. Place remaining ingredients into a blender. Blend on high till smooth. Pour marinade over the chicken. Seal and refrigerate overnight or at least four hours

Easy Refrigerator Pickles

Adapted from myrecipes.com

6 cups thinly sliced pickling cucumbers (about 2 pounds)

2 cups thinly sliced red onion

1 1/2 cups white vinegar

3/4 cup sugar

3/4 teaspoon salt

1/2 teaspoon mustard seeds

1/2 teaspoon celery seeds

1/2 teaspoon ground turmeric

1/2 teaspoon crushed red pepper

1/4 teaspoon freshly ground black pepper

4 garlic cloves, thinly sliced

1 teaspoon dill weed (add fresh dill if desired)

Place 3 cups cucumber in a medium glass bowl; top with 1 cup onion. Repeat procedure with the remaining 3 cups cucumber and remaining 1 cup onion. (You can also divide evenly among some type of glass jars with tight fitting lids instead of placing into a bowl.)

Combine vinegar and remaining ingredients in a small saucepan; stir well. Bring to a boil; cook 1 minute. Pour over cucumber mixture; let cool. Cover and chill at least 4 days.

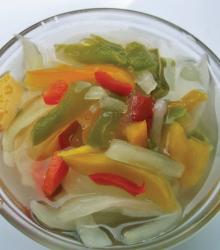
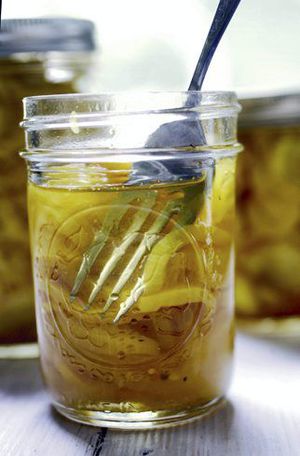
Sweet Refrigerator Pickles

The original recipe I started with called for 1 teaspoon turmeric. I don’t particularly care for that seasoning. So after quite a few adjustments I came up with a version of a sweet pickle recipe that suited my taste.

3 cups sliced cucumbers

1 cup sliced onions

1 clove garlic, peeled and sliced

1 tablespoon pickling salt, sea salt or kosher salt

1 cup apple cider vinegar

1 3/4 cup white sugar or 7/8 cup honey to taste

1 teaspoon mustard seed

1/2 teaspoon celery seed

1/2 teaspoon ground cloves

2 cloves, sliced

Wash and dry 4-5 small jars or 2-quart jars. Make sure the jars have tight-fitting lids. Place the cut up cucumbers into the jars.

Combine the remaining ingredients in a saucepan. Bring everything to a boil and stir until the sugar or honey is completely dissolved into the mixture.

Pour the liquid over the vegetables in the jars. Make sure the vegetables are completely covered.

Pickled Green Beans

1 pound of fresh green beans, wash and cut off stems

3 cups apple cider vinegar

1 cup water

1/8 cup kosher or pickling salt

1/8 cup granulated sugar

2 cloves of garlic, peeled

1 teaspoon red pepper flakes

Fresh dill sprigs

Black or white peppercorns

Wash and dry 2 glass jars (pint size). (Or double the recipe and use a quart jar.)

In the bottom of each jar, place a garlic clove, dill sprig, a few peppercorns and 1/2 teaspoon of the pepper flakes.

Tightly pack green beans into jars and set aside. Place the vinegar, water, salt and sugar in a medium sized saucepan. Bring to a boil over medium-high heat.

Boil the liquid for one minute. Remove from heat. Pour the hot vinegar liquid over the beans and screw lids on the jars. Set aside to cool.

Once the jars are cool, place in the refrigerator. Let the beans sit 24 to 48 hours before eating.

Roasted jalapeno salsa

Dawn Morin-Boucher, Free Press contributor   –   Burlington Free Press

My husband Dan used to be a serious meat-and-potatoes man.  He’d happily eat them every day, alternating frozen peas and canned corn niblets to shake things up.

Over the years, I’ve tried to vary the routine with raw and cooked fresh veggies, forages — things we’ve never even thought of eating (like pigeon).

But, I can’t change his cravings.

This salsa came about as the accompaniment for yet another grilled strip steak.

It was spicy and garlicky, with a lingering floral finish from Caledonia Spirits’ honey.  A perfect pairing for beef.

It won’t win any beauty contests, but all the ingredients are simply tossed into a blender and wham-o – done!

I love that!

I wanted to serve them as a salad, so I refrigerated both.

The steak disappeared.

I grilled another, leaving Alice in Wonderland style instructions: “Do Not Eat This!”

He suggested I could simply cook another … but we’d still be playing that game if I had bought in.

Farmer/cheesemaker/writer Dawn Morin-Boucher resides at the Boucher Family Farm in Highgate Center. Blog: boucherfamily farm.blogspot.com. Email: boucherfarm@comcast.net.

Roasted jalapenos on the grill to be used in a homemade salsa (Photo: Dawn Morin-Boucher/for the Free Press)

Roasted jalapenos on the grill to be used in a homemade salsa (Photo: Dawn Morin-Boucher/for the Free Press)

Roasted Jalapeno Salsa

Makes  1 ½ to 2 cups

1 large sweet onion

8 cloves of garlic

3 grilled jalapenos; skin, seeds, stem removed

3 tablespoons olive oil

2 tablespoons rice wine vinegar

1 tablespoon raw honey (I used Caledonia Spirits honey)

¼ teaspoon salt

Whiz all ingredients in a blender.  Adjust salt to taste.

Let stand 40 minutes at room temperature or overnight in the refrigerator.

Can also be used as the base for curries.

Chef at the Market: Quick pickles and a tangy radish salad

Gary Black gblack@newsminer.com   –   newsminer.com

Editor’s note: Chef at the Market is a program in which local chefs use Alaska ingredients to prepare a meal at the Tanana Valley Farmers Market.

The program, now in its fifth season, is the result of a partnership between the Fairbanks Economic Development Corporation, the Rasmuson Foundation, Jeff Cook and family, and the farmers market. On Wednesdays when the program takes place, we’ll feature the chef for that day as well as a recipe or two. Today, chef Sean Walklin will work with tomatoes between 11 a.m. and 2 p.m. at the market at 2600 College Road.

For more information about Chef at the Market, including recipes from previous years, visit www.growfairbanks.com.

About the chef: Chef Sean Walklin is a professor at University of Alaska Fairbanks’ Community and Technical College Culinary Arts and Hospitality program. Walklin also is the co-owner and executive chef at San Zanobi Catering. He was the 2015-16 Midnight Sun Chef Association’s Citizen Chef of the Year, an award recognizing community service and professionalism. He recently taught a weeklong garden-to-table course for the Fairbanks Summer Arts Festival. Chef Walklin’s passion for fresh, local ingredients is rooted in his culinary training at the Apicius International School of Hospitality in Florence, Italy, where he studied culinary arts. He uses local products whenever possible and has been active in Chef at the Market and Chef at the Clinic, promoting the use of local products.

Chef Walklin also is an active participant in community events, including HIPOW, Festival Fairbanks’ Potato Festival, UAF CTC’s Scholarship Dinner and the Fairbanks Children’s Museum. He encourages everyone to attend the 2016 Fairbanks Children’s Museum Exploration of Food and Wine on Aug. 27.

Quick pickled turnips

This is a basic brining ratio that you can use for any vegetable to make a quick pickle. This is not the recipe for a longterm stored pickle. I like this recipe because it is simple, flavorful and versatile. You can omit the sugar; add herbs, pepper flakes or garlic; or use more exotic vinegars. I’ve also found that you can skip the cooking process in the beginning and have an even quicker pickle, especially if you slice your ingredients thinly. Heating does increase the flavor absorption. It’s a great time of the year to pickle all the produce that is coming out of the gardens.

2 cups apple cider vinegar

2 cups water

1/2 cup sugar (optional or decrease amount of sugar if desired)

1 tablespoon salt

1 tablespoon black peppercorns

1 tablespoon mustard seeds

Your pickle ingredients, about 1 pound (in this case, turnips)

Fresh herbs such as dill, thyme, rosemary, tarragon, etc. (optional)

Heated version

Bring all the ingredients except the vegetable to be pickled to a simmer in a medium pot on medium high heat. Reduce the heat to maintain the simmer and cook for 10 minutes.

Meanwhile, cut the vegetables into about 3-inch-long segments with the thickness of a quartered cucumber.

Place the veggies in a heatproof container and pour the hot pickling liquid over them. Let it cool to room temperature and refrigerate at least 2 hours.

Unheated version

Mix all ingredients except the vegetable to be pickled thoroughly in a bowl and whisk until the water and sugar is dissolved.

Veggies can be cut paper thin using a mandolin or cut julienne with a knife. Cold pickling will not make the thin cuts mushy. Cut to your desired thickness and pour the pickling liquid over the veggies in a sealable container. Chill at least 2 hours.

Both versions can he held for two weeks in the refrigerator in a sealable container.

Radish and fruit salad

This recipe is a balance between the spiciness of the radish and the sweetness of the fruit. It is a light and flavorful salad with a pleasant crunch. It is great for topping salmon or flank steak or served in a bowl by itself. It is very easy and quick to make and each ingredient should come through at the end.

6-8 radishes, cut in a medium dice or baton

Choice of 1 green apple, 1 peach, 1 nectarine or 1 pear, cut in a medium dice and kept in lemon water (to prevent browning)

1 small bunch fresh mint, basil, tarragon, chives or any other brightly flavored herb (use the smallest leaves possible)

2-5 tablespoons of vinaigrette (recipe follows)

Apple cider vinaigrette

1 cup olive oil

1/3 cup apple cider vinegar

honey or sugar to taste (start with 1 teaspoon)

salt/pepper to taste1 teaspoon Dijon mustard

Begin by combining the honey or sugar, Dijon and vinegar in a bowl. Slowly whisk in oil until emulsified. Add salt, pepper, and more honey (if desired) with whisk.

Gently combine the cut radish and fruit with herbs and your desired amount of dressing. Best if allowed to marinate for at least 30 minutes before using.

Try these spicy yellow squash pickles

By Andrea Weigl   –   The Raleigh News & Observer

You will never think the same about yellow squash once you taste these pickles.

Juli Leonard/Raleigh News & Observer

Juli Leonard/Raleigh News & Observer

I make these every summer and anyone who receives them is soon asking for another jar. These pickles are great on pulled pork or ham and cheese sandwiches. Enjoy!

The recipe calls for pickling salt, which is free of additives and can be purchased with other canning supplies and/or next to the iodized salt at most grocery stores. For general instructions on water bath canning, go to freshpreserving.com/getting-started.

Sweet Yellow  Squash Pickles

  • 3 to 3-1/2 pounds tender young yellow squash, trimmed, scrubbed and sliced 1/4-inch thick
  • 3 medium yellow onions, peeled and thinly sliced
  • 1/2 cup pickling salt
  • 6 cups crushed ice
  • 3-1/2 cups sugar
  • 2 cups white distilled vinegar
  • 2 cups cider vinegar
  • 2 teaspoons mustard seeds
  • 1-3/4 teaspoons celery seeds
  • 1-3/4 teaspoon ground turmeric

Layer the sliced squash and onions in a very large nonreactive bowl, sprinkling each layer with salt. Pile the ice on top, set the bowl in the sink and let stand 3 hours.

Drain squash and onions, transfer to a very large colander and rinse under the cold tap water. Drain well, then, using the bowl of a ladle, press out as much liquid as possible.

Wash and rinse 8 1-pint preserving jars and their closures and submerge in a large kettle of boiling water.

Bring sugar, white and cider vinegars, mustard and celery seeds and turmeric to a rolling boil in a large nonreactive kettle. Add squash and onions and, stirring gently, return to the boil.

Lift preserving jars from the boiling water one by one. Pack with pickles, making sure they are submerged in the pickling liquid and leaving 1/4-inch head space at the top of the jar. Run a thin-blade spatula around the inside of the jar to release the air bubbles; wipe the jar rim with a clean, damp cloth, then screw on the closure. Repeat until all jars are filled.

Process jars for 10 minutes in a boiling water bath. Lift from water bath; complete the seals, if necessary, by tightening the lids, then cool to room temperature.

Makes 6 to 8 pints.

5 Taqueria-Style Recipes You Can Make at Home

By    –   Cheatsheet.com

If you’re lucky, you live close to great taqueria where you can get excellent tacos, tostadas, tortas, and other Mexican favorites whenever your heart (or stomach) desires. But if not, don’t despair. There’s no need to settle for Taco Bell when you need a Mexican fix since it’s possible to re-create your favorite taqueria-style recipes in the comfort of your own kitchen. Whether you craving creamy guacamole, spicy pickled veggies, or tacos al pastor, these five recipe will make your food dreams a reality.

1. Guacamole Taquero

food background with fresh organic avocado on  old wooden table, top view, copy space

Source: iStock

This smooth, creamy guacamole, which is made with a mix of avocado, tomatillo, and cilantro, is the perfect dip for chips or for finishing off tacos or burritos. Rather than the chunky-style guacamole many people make at home, this taco-shop version is thinner and salsa-like. This recipe from Saveur makes about 2½ cups.

Ingredients:

  • 8 ounces tomatillos, husked, rinsed, and chopped
  • ½ cup packed cilantro leaves
  • 1 tablespoon fresh lime juice
  • 1 teaspoon kosher salt
  • 2 cloves garlic, chopped
  • 2 jalapeno peppers, stemmed and chopped
  • 1 ripe avocado, pitted, peeled
  • ½ small white onion, chopped

Directions: Puree all ingredients in a blender until smooth.

2. Taqueria-Style Pickled Carrots and Jalapeños

Pickled carrots and jalapenos | Source: iStock

Pickled carrots and jalapenos | Source: iStock

If your favorite part of hitting your favorite taco shop is munching on the free pickled carrots and jalapeños, you’re going to love this recipe from Tasting Table. These spicy veggies are delicious on their own and also make a great topping for tacos and other dishes.

Ingredients:

  • ½ teaspoon cumin seeds
  • 2 cups white wine vinegar
  • 2 cups water
  • 2 tablespoons plus 1 teaspoon kosher salt, divided
  • 2 teaspoons dried Mexican oregano (or dried oregano)
  • ½ teaspoon black peppercorns, lightly crushed
  • 1 small red onion, peeled and cut into ⅛-inch slices
  • 2 to 4 jalapeño chiles, quartered (seeded for less heat)
  • 2¾ pounds carrots, peeled and cut on a bias ½ inch thick
  • 8 garlic cloves, peeled
  • 4 small dried red chiles (optional)

Directions: Add 4 pint-size jars and lids to a large, deep stock pot. Cover the jars with water, turn heat to high, and bring to a boil. Boil for 15 minutes. Using tongs, remove the jars and lids from the water and turn upside down onto a clean kitchen towel.

As the jars boil, start preparing the vegetables. Add the cumin seeds to a small skillet and toast over medium-high heat, stirring frequently, until golden and fragrant, about 1 to 2 minutes. Remove to a small plate and let cool. Add the vinegar, water, oregano, crushed peppercorns, and 1 tablespoon plus 1 teaspoon of the salt to a medium saucepan. Turn heat to high and bring to a boil. Add the onions and jalapeños and remove from heat.

Fill a large saucepan with water. Add the remaining 1 tablespoon of salt and bring to a boil. Add the carrots and simmer until they’re starting to soften but are still fairly crisp, about 3 minutes. Drain the carrots and immediately add to the pan with the vinegar and onions. Bring to a boil, then turn off the heat.

Divide the toasted cumin seeds, garlic cloves, and red chiles (if using) among the four jars. Transfer the carrots and onions among the jars using a slotted spoon. Pour in the hot vinegar, leaving ½-inch of space at the top. Fasten the tops onto the jars and refrigerate for up to 1 month.

3. Tacos al Pastor

Tacos al pastor | Source: iStock

Tacos al pastor | Source: iStock

You can thank Lebanese immigrants for tacos al pastor. When tens of thousands of people from the Middle East relocated to Mexico in the 19th and 20th centuries, they brought their culinary traditions with them, including the habit cooking meat for shawarma on a rotating spit. They substituted readily available pork for the traditional lamb and the flavorful meat eventually found its way into tacos, giving birth to an enduring fusion dish. Home cooks can try this simplified recipe from Food & Wine, which skips the long marinating time and spit roasting for a faster process that still yields tasty results.

One of Texas Tito’s employees’regular eating places is Cancun Mexican Restaurant mainly because it is within walking distance and also because their Tacos al pastor are the best around.  On the weekends they serve them on the patio on the traditional rotating spit with grilled onions, fresh onions, fresh radishes and grilled jalapenos.  There hasn’t been a recipe yet that quite matched this authentic experience but this one is worth a try.

Ingredients:

  • 1 tablespoon canola oil, plus more for brushing
  • 3 garlic cloves
  • 1 teaspoon dried oregano
  • ½ teaspoon ground cumin
  • ½ teaspoon pepper
  • ¼ teaspoon ground cloves
  • 4 guajillo chiles, stemmed, seeded and cut into 2-inch pieces
  • ⅓ cup pineapple juice
  • ¼ cup distilled white vinegar
  • 2 tablespoons achiote paste
  • Sea salt
  • 2 pounds boneless pork shoulder, sliced ¼ inch thick
  • ½ medium pineapple, peeled and sliced ½ inch thick
  • 1 medium red onion, sliced crosswise ½ inch thick
  • 2 whole fresh jalapenos, finely diced
  • Warm corn tortillas, chopped cilantro and lime wedges, for serving

Directions: In a medium saucepan, heat the 1 tablespoon of oil. Add the garlic and cook over moderately high heat, turning occasionally, until lightly browned, about 1 minute. Stir in the oregano, cumin, pepper and cloves, and cook until fragrant, about 1 minute. Add the chiles and cook, stirring, until blistered in spots, about 30 seconds. Add the pineapple juice, vinegar, and achiote paste and bring to a boil. Remove from the heat and let stand for 5 minutes.

Transfer the chile mixture to a blender and puree until smooth. Season with salt. Scrape the marinade into a large, sturdy plastic bag. Add the pork and turn to coat. Set the bag in a small baking dish and refrigerate overnight.

Light a grill or preheat a grill pan. Brush the pineapple and onion with oil. Grill over high heat, turning once, until lightly charred and softened, 3 to 5 minutes. Transfer to a carving board and tent with foil.

Remove the pork from the marinade. Grill over high heat until lightly charred and just cooked through, 2 to 4 minutes. Transfer to the carving board and let rest for 5 minutes. Cut the pineapple, onion and pork into thin strips and transfer to a bowl. Season with salt. Serve with corn tortillas, chopped cilantro, diced jalapenos and lime wedges.

4. Carne Asada Burrito

Burrito | Source: iStock

Burrito | Source: iStock

Carne asada burritos are a taco shop staple in Southern California. Unlike the Mission-style burritos you’ll find at Chipotle and other restaurants, these burritos skip the rice and beans. Aside from meat, the only fillings are guacamole, cheese, and pico de gallo. This recipe is from Carne and Papas and serves 5.

Ingredients:

  • 4 pounds steak tips chopped (use flap steak with fat in it)
  • 1 tablespoon garlic salt
  • 1 tablespoon soy sauce
  • 3 tablespoons olive oil
  • 1 teaspoon freshly ground pepper
  • Burrito-sized tortillas (the largest size you can find)
  • Guacamole
  • Pico de gallo (diced tomatoes, jalapenos, onions, cilantro, lime juice, seasonings)
  • Green onions, diced (optional)
  • Shredded Mexican cheese
  • Chipolte mayo
  • Queso fresco
  • Hot sauce, for serving

Directions: Chop the steak. Add the garlic, salt, soy sauce, and olive oil and let sit for 15 minutes.

Heat a cast iron pan over high heat. Once the pan is very hot, add some of the meat to pan. You’ll need to work in batches to ensure the meat browns. Let the meat cook without stirring for a few minutes, stir, then cook for another 1 to 2 minutes. Some of the steak pieces should be charred. Remove from the pan and cook the remaining steak.

Heat a griddle to 300 degrees Fahrenheit. Place a tortilla on the griddle and cook for 30 seconds. Flip and top with some shredded cheese and a pinch of green onions. Cook for another 30 seconds, just until the cheese starts to melt. Transfer to a plate, then top with the steak, guacamole, pico de gallo, queso fresco, and chipotle mayo. Fold the burrito. Serve with hot sauce.

5. Horchata

Horchata | Source: iStock

Horchata | Source: iStock

A refreshing glass of sweet horchata is the perfect accompaniment to a plate of spicy tacos. It’s often made with almonds and rice (like the recipe below), but numerous variations exist. Making your own isn’t hard, though you’ll need to plan ahead since some of the ingredients need to soak overnight. This recipe is from The Kitchen.

Ingredients:

  • 1 cup long grain white rice
  • ¾ cup blanched almonds
  • 1 (1-inch to 3-inch) piece of cinnamon stick
  • 5 cups water, divided
  • ¼ cup sweetened condensed milk
  • ¼ teaspoon vanilla
  • Ice for serving
  • Ground cinnamon for garnish

Directions: Soak the rice, almonds, and cinnamon.  Place the rice and almonds into a bowl. Break up the cinnamon stick into several pieces and add to the rice and almonds. Cover with 4 cups of hot (but not boiling) water.  Cover the bowl and refrigerate at least 2 hours but preferably overnight.

Using a stick or regular blender, blend the rice, almond, and cinnamon mixture until it is very smooth. This may take up 2 to 3 minutes.

Pour the rice and almond mixture into a strainer set over a pitcher. Strain out as much liquid as possible, pushing on the solids with a spatula or spoon. Stir the remaining cup of water, sweetened condensed milk, and vanilla into the pitcher. Taste and add more sweetener or water as needed.

Add ice to the pitcher, stir again, and serve in glasses, garnished with the ground cinnamon.

Follow Megan on Twitter @MeganE_CS

Bread and Butter Pickle Slices

6 pounds of 4 to 5-inch pickling cucumbers

8 cups thinly sliced onions (about 3 pounds)

½ cup canning salt

crushed or cubed ice

4 cups vinegar (5 percent)

4 ½ cups sugar

2 tablespoons mustard seed

1 ½ tablespoons celery seed

1 tablespoon ground turmeric

Preparation

Wash cucumbers.

Cut 1/16 inch off blossom end and discard.

Cut into 3/16 inch rings.

Combine cucumbers and onions in a large bowl.

Add salt.

Cover with 2 inches crushed or cubed ice.

Refrigerate 3 to 4 hours, adding more ic6 pounds of 4 to 5-inch pickling cucumbers as needed.

To make pickles

Add sugar and remaining ingredients to vinegar in a large pot.

Boil 10 minutes.

Add well-drained cucumbers and onions, and slowly reheat to boiling.

Fill pint or quart jars with slices, leaving ½ inch headspace.

Fill to ½ inch from top with hot cooking liquid.

Remove air bubbles.

Wipe jar rims.

Adjust lids.

Process pints or quarts for 10 minutes in a boiling water bath. After processing and cooling, jars should be stored four to five weeks before use to develop ideal flavor.

(Used with permission from the WVU Extension office. Full recipe, including a variation for crisper pickles is available in “So Easy to Preserve,” published by Cooperative Extension The University of Georgia.)

Recipe: Simple toppings create complex flavors

Helena Spensatelli, Saucygirlskitchen.com

Mexican Pizza with Jalapenos

(Photo: Helena Spensatelli / Saucygirlskitchen.com)

I love making pizza at home. It’s really simple to make the dough yourself. This recipe is my favorite for pizza crust and flatbread (rolled extra thin), and it turns out perfect every time. However, you always have the option to buy a ready-made pizza crust, and there’s lots of great options in the grocery store. I think the best part of making pizza at home is topping it with all your favorites — and lots of cheese.

The recipe I’m sharing today has become our new family favorite. The toppings are simple, but the flavor is anything but simple.

Mexican Pizza

Makes one 12” pizza

Dough:

1 cup warm water

2 ½ teaspoons dry active yeast

1 tablespoon honey

2 ½ to 3 cups all-purpose flour

1/2 teaspoon salt

2 tablespoon olive oil

Pizza sauce:

1/2 cup cilantro

1/4 cup pickled jalapeños

3 tablespoons olive oil

1 tsp cumin

Toppings:

2 to 3 cups of shredded Mexican cheese blend

2 roma tomatoes, diced

1 cup fresh corn

½ red onion, thinly sliced

½ cup black olives, halved

2 tablespoons capers

More pickled jalapeños, optional (but nice if you like it spicy)

Preheat oven to 400 degrees.

Mix the honey and warm water together in a small bowl.

Add the yeast to the water and let it sit for 15 minutes until a nice foam forms from the yeast growing.

Place flour and salt in a mixing bowl with the dough hook attachment and slowly add the yeast mixture.

Mix on medium-high for about five minutes, until the dough becomes elastic and firm.

Remove dough from bowl and rub lightly with olive oil.

Place in a bowl and cover with a clean dry towel.

Let sit in a warm place to rise for 20 minutes (it should double in size).

While the dough is rising you can make the sauce for the pizza.

Blend the cilantro, pickled jalapeños, olive oil, lime juice and cumin together in the food processor until a smooth paste is formed.

Set aside until you have your pizza crust ready to top.

After the dough has risen, place it on a floured surface.

If you want to make smaller individual pizzas, cut dough into portions, or use for one large pizza.

Roll out to desired thickness and size, or shape using your hands, gently stretching the dough into the shape you desire.

Place dough onto a lightly greased pizza baking pan.

Spoon the cilantro sauce onto the pizza crust and spread evenly.

Evenly distribute the cheese and toppings on the crust.

Bake for 10-15 minutes or so, depending on the thickness of the crust.

Remove, cut into slices and serve.

For a crispier crust, cook your pizza crust for about seven minutes before topping it with anything.

To take a recreational cooking class in Murfreesboro, visit thecuriouskitchen.net. Visit saucygirlskitchen.com for more recipes.

Lacto-Fermented Green-Cherry Tomato Pickles

By Kirsten K. Shockey   –   Mother Earth News

Lactofermented Green Cherry Tomato Pickles

Even the smallest garden—as in a few pots on a sunny windowsill—has a cherry tomato plant. They don’t ask for much and they give a lot. These bite-sized sweet tomatoes are the first to ripen and are therefore very exciting in late June or July when we are anticipating the fresh sweet homegrown tomato flavor.  It’s soon over: one day in August the first slicer comes on and well, the cheery cherries start to loose their magic mostly because you just can’t keep up with them.

Don’t get me wrong—they are still tasty and easy and wonderful to pop in your mouth as you pass by the prolific plant, but they just keep coming. They are also a challenge to preserve in sauce or salsa since they are so small. I hate to waste good food, even tiny tomatoes, but when the big beefy slicers and paste tomatoes are on I ignore the little ones. Last year I came up with a strategy—get ‘em while they are green.

These become a fun little side to serve later in the year, when the fresh tomatoes are once again part of our summer dreams.

The trick with these tomato pickles is to not pick the smallest, hard, dense ones. Choose the fruits on the vine that are close to full size and while still green, are not white-green but verdant and headed toward ripenin.

Green Cherry Tomato Pickles

Prep time: 5 minutes

Wait time: 7 days of fermentation

Yield: 1 quart

Ingredients

• 2 pint baskets green cherry tomatoes, or enough to fill a quart jar to the shoulder
• 3 cloves garlic, whole, peeled and lightly crushed
• 1 small dried whole chili
• 2 tablespoons mustard seed
• 1 tablespoon coriander seed
• 1 tablespoon green peppercorns, black peppercorns work well also
• 1 grape leaf, optional

For the brine:

• 1 tablespoon unrefined salt
• 2 ½ cups unchlorinated water

Instructions

1. Place the garlic and spices in the bottom of the jar. Add the tomatoes, stop filling at the neck; it is okay if you have a little less.

2. Stir the salt into room temperature water and pour this brine over the top of the tomatoes until completely submerged. If using top with the grape leaf tuck it under at the edges, this will help keep the tomatoes from floating out of the brine. (Or, add a small fermentation weight.) Remember that under the brine everything is fine! Put any extra brine in the fridge to top off if needed during the fermentation process.

3. Put a lid on your jar (or a water lock lid if you have one) and screw it down. Instructions for a simple set up are here.

4. If you are using an airlock continue to step 6. (If you are curious about what that is click here.) If you are using a tightened lid, check it daily: when the lid starts to tighten when you press on it, open it slightly and you will hear a slight hiss as the gas escapes. If some brine bubbles out, do not worry—just replace with some of the reserved brine when it settles down, and make sure the tomatoes are all still submerged.

5. Keep your jar on a plate on the counter for about 7 days. At this point your brine should be cloudy and the ferment should smell nicely sour. Taste your pickles. They will be nicely soured; if you would like them more sour, tuck everything back in and let it ferment for another week or two.  Manage it as described above. These will keep in the refrigerator for about 6 months.

Kirsten K. Shockey is a post-modern homesteader who lives in the mountains of Southern Oregon. She writes about sauerkraut and life—but not necessarily in that order. She’s written a complete book of Fermented Vegetables and maintains the website Ferment.works.

Pickle Recipes for August

Dill pickle dip

8 ounces cream cheese

1 cup sour cream

1 tsp onion powder

1 tsp parsley

3/4 cup dill pickle spears, drained and finely chopped (about 6 spears)

5 ounces dried beef, finely chopped

Combine cream cheese, sour cream and seasonings in a bowl. Beat until smooth. Stir in pickles and beef. Cover and chill in refrigerator for at least two hours. Serve with crackers.

Crunchy pickle and ham

1 12-ounce package of smoked cooked ham (or any favorite lunch meat)

1 24-ounce jar dill spears, drained

1 8-ounce tub soft cream cheese

Pat ham and pickle spears dry with paper towel. Spread ham slices with about 1 tablespoon cream cheese. Top each ham slice with 1 pickle spear and roll up. Refrigerate 1 hour or overnight. Cut each pickle roll in to 4 to 6 pieces to serve as appetizers.

Dill pickle lovers pasta salad

1/2 pound dry shell pasta (about 3 cups)

3/4 cup sliced pickles

2/3 cup cheddar cheese, diced

3 tablespoons onion, finely diced

2 tablespoons fresh dill

1/2 cup pickle juice

Dressing:

2/3 cup mayonnaise

1/3 cup sour cream

1/8 teaspoon cayenne pepper

4 tablespoons pickle juice

Salt and pepper to taste

Boil pasta according to package directions. Run under cold water to stop cooking. Toss cold pasta with about a half cup of pickle juice and set aside for about 5 minutes. Drain and discard pickle juice. Combine all dressing ingredients in a small bowl and mix well. Toss all ingredients in a large bowl. Refrigerate at least 1 hour before serving.

Puckering pickle pops

30 ounces pickle juice (dill works best)

A pinch of sugar to taste (optional)

Place 5 ounces of juice (mixed with a small amount of sugar, if desired) into six Popsicle molds with Popsicle sticks. Small Dixie cups or an ice cube tray work well also. Freeze until firm.

Stuffed dill pickles

2 large dill pickles

1 (5 1/2 ounce) jar cheese spread, any flavor

Cut off both ends of the pickles, and using an apple corer, scoop out the center removing all of the seedy pulp. Fill the center of the pickle with the cheese spread. Chill several hours. Cut each pickle into 1/4-inch slices.

Fire and ice pickles

2 32-ounce jars medium whole dill pickles

4 cups sugar

2 Tablespoons hot sauce

1/2 to 3/4 teaspoon crushed red pepper flakes

2 Tablespoons garlic

Cut pickles into 1/4-inch slices.

Combine pickles sugar, hot sauce and red pepper flakes in large bowl.

Cover and let stand 2 hours. Stir well and spoon mixture back into jars. Add 1 teaspoon crushed garlic to each jar. Cover and refrigerate up to 1 month for best

flavor.