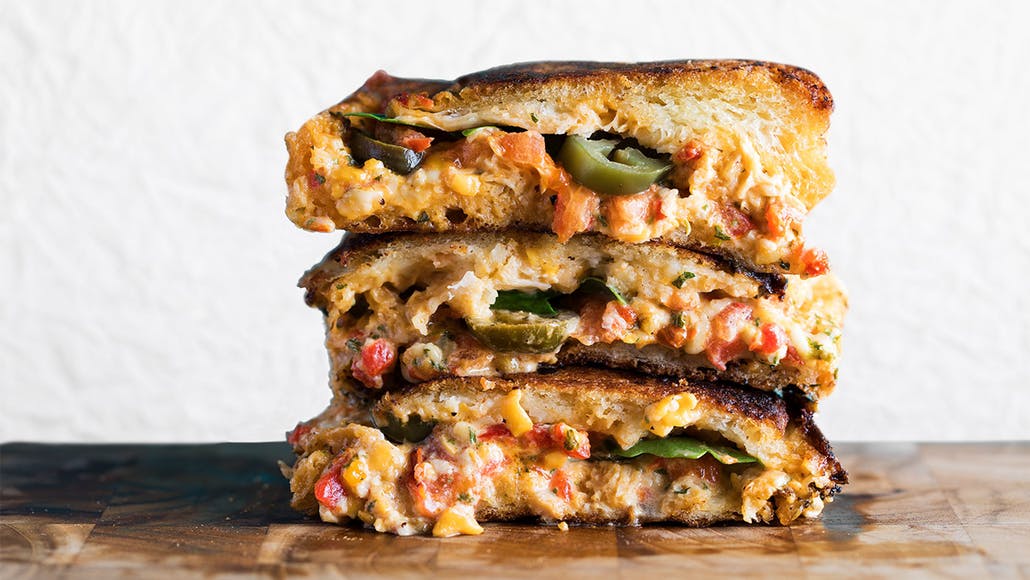
Southern Cornbread with Honey Butter and Pickled Jalapeno Relish

By MARIO BATALI   –   ABC.com

servings: 8|easy|30 to 45 min

Southern Cornbread with Jalapeno Relish

Mario’s Cornbread will be your new favorite side dish!

INGREDIENTS:
FOR THE SOUTHERN CORNBREAD:
  • 1 cup all-purpose flour
  • 1 cup yellow cornmeal
  • 1 teaspoon baking powder
  • 1 teaspoon baking soda
  • 1 teaspoon Kosher salt
  • 1 cup buttermilk
  • 2 large eggs (beaten)
  • 4 tablespoons unsalted butter (melted, plus 4 tablespoons cold unsalted butter)
  • 3 tablespoons olive oil
FOR THE HONEY BUTTER:
  • 1 stick unsalted butter (room temperature)
  • 2 tablespoons honey
  • Kosher salt (to taste)
FOR THE PICKLED JALAPENO RELISH:
  • 1 cup champagne vinegar
  • 1/2 cup white wine vinegar
  • 1 cup water
  • 6 tablespoons sugar
  • 1 star anise pod
  • 1/2 teaspoon mustard seeds
  • 1 bay leaf
  • 1/2 teaspoon red chili flakes
  • 3/4 pound jalapeno peppers (thinly sliced)
  • 1/2 red onion (peeled)
  • 2 tablespoons olive oil
  • 2 tablespoons honey
DIRECTIONS:
  • For the Southern Cornbread: Preheat the oven to 400ºF. Place a 9-inch cast-iron skillet in the oven to heat.
  • In a large bowl, combine the flour, cornmeal, baking powder, baking soda, and salt. Add the buttermilk, eggs, melted butter and olive oil. Stir to combine.
  • Carefully remove the heated pan from the oven. Add the cold butter and let it sizzle until it browns, then pour the batter into the pan. Return to the oven and bake for 15 to 17 minutes, until the cornbread starts to brown. Slice into wedges and serve warm with the honey butter and pickled jalapeno relish.
  • For the Honey Butter: In a medium bowl, combine the softened butter, honey and season with Kosher salt to taste. Transfer to a glass jar for serving.
  • For the Pickled Jalapeno Relish: In a large non-reactive saucepan, add the vinegars and water and bring to a simmer. Add the sugar, star anise, mustard seeds, bay leaf and chili flakes. Simmer for about 3 minutes.
  • Place the sliced jalapenos in a 1-quart mason jar and cover them with the pickling liquid. Allow the jar to cool to room temperature, cover with the lid and refrigerate overnight until ready to use.
  • In the bowl of a food processor pulse the red onion until finely chopped. Heat a saute pan over medium heat and add the olive oil. Saute onion for 3-4 minutes until softened. Add 3 cups pickled jalapenos to the food processor and pulse until finely chopped. Remove to the saute pan, add 1/2 cup of the pickle brine and honey and bring to a simmer. Allow to cool and store in a glass jar until ready to use.
  • Tip: The honey butter and relish can be stored in airtight containers and kept in the refrigerator for up to 2 weeks!

How To Make Mac And Cheese Stuffed Jalapeño Peppers

Kirsten Nunez

By Kirsten Nunez

There is something magical about stuffing food with other food. I mean, just take a look at this recipe for homemade mac and cheese stuffed jalapeño peppers: It lets you combine cult-favorite ingredients into a single dish. And while it is easier to throw chopped peppers into macaroni and cheese — where is the fun in that? This technique is way more gram-worthy. Just saying.

It also doubles as a delicious party appetizer. Instead of spoons and bowls, you will just need your good old fingers, and maybe even some napkins. To spice things up, serve these peppers with salsa. Sour cream, on the other hand, is ideal if you want to turn down the heat. Craving a healthier option? Opt for plain Greek yogurt with cilantro. The cooling effect of this simple sauce will complement the peppers perfectly.

The best part is that you can use homemade or boxed macaroni and cheese. The choice is yours. Obviously, homemade mac and cheese will taste better, but the latter is useful for when you are in a rush. You can even try this out with a vegan version.

To (literally) top it off, these stuffed peppers call for crushed tortilla chips instead of breadcrumbs. Yes. Please.

Source: Kirsten Nunez

Ingredients:

  • 8 to 10 jalapeño peppers
  • Macaroni and cheese (boxed or homemade)
  • Tortilla chips
  • Grated cheese
  • Spices and butter (optional)

You’ll also need to wear gloves while handling the jalapeño peppers. If you don’t have gloves, be extra careful and avoid touching your face. The juice and seeds will sting.

1. Pre-heat the oven to 450 degrees F. Cut each jalapeño pepper lengthwise.

2. Using a small spoon, scoop out the peppers and veins from each jalapeño half.

3. Place the jalapeño halves on a baking sheet. Bake for 5 to 10 minutes until soft.

4. Meanwhile, crush the tortilla chips in a coffee bean grinder or food processor. You’ll need just under a quarter of a cup for every 10 jalapeños.  If you’d like, mix the tortilla chip crumbs with melted butter. This will help them turn brown, crispy, and delicious. You can also add spices for an extra boost of flavor.

5. Scoop macaroni and cheese into each jalapeño half.

6. Top each jalapeño half with grated cheese and chip crumbs.

7. Pop back in the oven for another five minutes, or until the cheese melts.

Now, that’s what I call a party in your mouth.


Fiesta Chicken Burrito Recipe – Made with Pain Is Good Batch #218 Smoked Jalapeño Salsa from Peppers.com

April 8, 2017

Pain Is Good Batch #218 Smoked Jalapeño Salsa

Ingredients:
  • 1 pound skinless boneless chicken breasts
  • 2 teaspoons Butter
  • 1 pinch Pinch salt
  • 1 pinch Pinch pepper
  • 2 cups shredded Cheddar
  • 2/3 cup Sour Cream
  • 1 cup diced green pepper
  • 1/3 cup Pain Is Good Batch #218 Smoked Jalapeño Salsa
  • 1/2 cup sliced black olives (optional)
  • 1 Jalapeño pepper, seeded and minced
  • 2 tablespoons chopped fresh cilantro
  • 4 large flour tortillas

Pain Is Good Batch #218 Smoked Jalapeño Salsa

Directions:
  1. Cut chicken into small 1-inch (2.5cm) cubes. In skillet, melt butter over medium high heat and cook chicken for about 8 minutes or until no longer pink inside. Salt and pepper to taste. Pour into large bowl and stir in 1/2 cup (375mL) of the cheese, sour cream, green pepper, Pain Is Good Batch #218 Smoked Jalapeño Salsa, olives, Jalapeño, and cilantro.
  2. Preheat oven to 350 degrees F (180 degrees C).
  3. Divide mixture among tortillas: Fold and roll to enclose filling completely; place seam side down in small baking dish. Sprinkle with remaining cheese.
  4. Bake in center of oven for about 20 minutes or until cheese is melted and tortillas are crispy.
Check out all of our great sauces and spices at www.Peppers.com

ROB RABINE: Recipe — Go ahead and pickle it

By Ron Rabine   –  Shore Line Times

Pickling veggies is not only artisanal, but good for your gut, the author says.


Who doesn’t like a good pickle? You kind of take them for granted until you taste a bad one.

The first time I made a batch of sour dill pickles, I had to move them out to the barn because I used a container that had a loose top and the entire house smelled like pickles for three days. It was only after we finished the pickles and I washed out the container that I noticed the bottom said, “Not safe for food storage.” I should probably get tested for lead poisoning. Live and learn. Now I use a mason jar.

Salt-based, lacto-fermented foods like pickles, sauerkraut, kimchi and the like are quite popular right now for a couple reasons: one-they are artisanal and that’s always popular, and two-because of their probiotic benefit. It’s good for your gut, so to speak.

Salt-based brines are called lacto-fermentation brines not because of any milk-based products, but because of the naturally occurring lacto-bacteria that eats sugar and makes lactic acid as a by-product, making your pickles tart.

Use any combo of vegetables you want, just keep them anaerobic, under water the whole time, and skim off any foam that collects. Filtered or distilled water helps the fermentation process. Follow me on Istagram @robert.rabine. I’m wicked interesting.

Mixed Pickled Vegetables

3 tablespoons kosher salt

1 quart filtered or distilled water

1 cup celery, sliced ½ inch thick on the bias

½ cup cucumber, peeled and sliced in half lengthwise, then cut an inch thick

½ cup carrot, peeled and sliced ½ thick on the bias

½ cup asparagus spears, trimmed and sliced ½ inch on the bias

½ cup red pepper, sliced ½ inch thick

1 clove garlic, peeled and smashed

1 bay leaf

½ teaspoon mustard seeds

¼ teaspoon whole black peppercorns

1 cabbage leaf

Combine the salt and room temperature water and stir until the salt is completely dissolved. Layer the vegetables and other ingredients in a clean mason jar, leaving about an inch of space on top. Pour enough salt water over the vegetables, pressing them down tightly with a clean spatula so they are completely submerged under the brine. Top with the cabbage leaf. Seal the jar tightly and leave out in a warm spot in the kitchen. Once a day, open the jar to let out some of the gas, and skim off and foam that collects on top. Taste the pickles after three days or so. Refrigerate after they taste sour enough for you-from 3 to 5 days. Pickles last up to a month in the refrigerator. Yield 1 quart.

Boozy, cheesy quesadillas get a kick from tequila, jalapenos

Lake Fong/Post-Gazette
St. Rita Quesadillas are filled with mushroom, onion, black beans, corn and cheddar cheese, and topped with feta, cilantro and jalapeno slices.


Traditionally in Mexico, the quesadilla is a small corn tortilla doubled over a filling of stringy Oaxaca cheese, poblano chili and serrated epazote leaves, and cooked on an ungreased griddle until it’s mottled with brown spots.

But when it crosses the northern border, the quesadilla is gussied up and all kinds of ingredients make their way inside. The tortilla wedge does not differentiate when it comes to cheeses or vegetables/meats and appears as a fried appetizer or grilled entree at a lunch or dinner table. It’s often made with a flour tortilla and loaded with semisoft cheese such as cheddar, and cooked until the cheese melts.

In “Cooking With Cocktails,” author Kristy Gardner says a bottle of St-Germain inspired her to come with the St. Rita quesadillas. The bold and brazen quesadillas are filled with a mushroom-black bean-corn-pickled jalapeno mixture that is spiked with tequila and St-Germain, a fruity-floral liqueur infused with elderflowers. I found citrusy liqueurs such as Grand Marnier or Triple Sec also work just as well.

And that’s not all. A whole cup of cheddar cheese goes into the filling and crumbled feta cheese sits on top. To turn up the heat and flavor, sliced jalapenos and finely chopped cilantro are scattered all over this masterpiece.

You won’t have to worry about serving it with guac, salsa or that lame dollop of sour cream; St. Rita is wondrous just by itself.

— Arthi Subramaniam, Post-Gazette 

St. Rita Quesadillas

PG tested

2 tablespoons olive oil, plus more for brushing tortillas, divided

10 ounces baby bella mushrooms, wiped clean and cubed

Coarse sea salt and freshly ground black pepper, to taste

1/2 cup white onion, finely diced

1 (14-ounce) can black beans, drained and rinsed

2 garlic cloves, minced

1 tablespoon pickled jalapeno, diced

1/2 teaspoon ground cumin

2 tablespoons silver tequila

2 tablespoons St-Germain liqueur

1/2 cup frozen corn, thawed

6 medium flour tortillas

6 cups cheddar cheese

1/2 cup crumbled feta

Fresh cilantro, for garnish

1/4 jalapeno pepper, thinly sliced, for garnish

Drizzle 2 tablespoons oil into a large frying pan over medium heat. When oil is hot, add mushrooms and season generously with salt and pepper.

Saute until mushrooms are cooked through and start to get a good amount of color on them.

Add onion and cook for about 5 minutes, or until softened.

Toss in black beans, garlic, pickled jalapeno, cumin, tequila and St-Germain. Cook for 5 minutes, stirring often.

Add the corn and heat through for a couple of minutes.

Pour stuffing mixture into a bowl, wipe out the pan, and place it back on the heat.

Brush one side of a tortilla with a small amount of oil. Place tortilla, oil side down, and cover one-half with 3/4 cup cheddar and 1/2 cup filling mixture.

Add another 1/4 cup cheddar. This will help hold the filling in place.

Using a spatula, fold the empty half of tortilla over the filling. When the bottom gets crispy and cheese starts melting, carefully but swiftly flip over the quesadilla to crisp the other side.

Remove from pan and set aside on a cutting board. Repeat until all quesadillas are made.

Cut quesadillas into quarters and serve sprinkled with feta, cilantro and jalapeno slices.

Serves 6.

— Adapted from “Cooking With Cocktails” by Kristy Gardner (The Countryman Press; February 2017; $29.95)

Maple-Turmeric Pork Chops with Pickled Carrots and Daikon

By Sam Talbot – Today.com

Nathan Congleton / TODAY

COOK TIME:

PREP TIME:

SERVINGS:

4

This filling dish mixes savory pork with bright, fresh pickles. The pickles can be made up to 3 days ahead.

Ingredients

    • 3/4 cup plain yogurt (not Greek-style)
    • 2 teaspoons grated peeled turmeric root
    • 1 tablespoon grated garlic
    • 1/2 cup pure maple syrup
    • 4 (1/2-pound) bone-in pork chops (about 1 1/2 inches thick)
    • 1 teaspoon black pepper
    • 3½ teaspoons kosher salt
    • 8 ounces carrots, peeled and cut into matchsticks
    • 1 large daikon, trimmed and cut into matchsticks
    • 1 cup apple cider vinegar
    • 1 cup water
    • 1 (1-inch) piece ginger, peeled and sliced
    • 2 teaspoons yellow mustard seeds
    • 2 tablespoons peanut oil

Preparation

1. Combine the yogurt, turmeric, garlic, and 1/4 cup of the maple syrup in a large zip-top plastic freezer bag. Sprinkle the pork with the pepper and 2 teaspoons of the salt. Place the pork chops in the bag with the marinade; seal and turn to coat. Chill, turning occasionally, at least 8 hours or overnight.

2. Place the carrots and daikon in a medium bowl. Combine the vinegar, 1 cup water, ginger, mustard seeds, and remaining 1/4 cup maple syrup and 1½ teaspoons salt in a small saucepan. Bring to a simmer over medium-high. Pour the mixture over the carrots and daikon in the bowl. Cool to room temperature; cover and chill at least 8 hours or overnight.

3. Preheat the oven to 400°F. Remove the pork from the marinade; discard the marinade. Heat the oil in a large ovenproof skillet  over medium-high. Add the pork chops; cook until deep golden brown, about 4 minutes. Turn the pork chops, and transfer the skillet to the preheated oven. Bake until a meat thermometer inserted into thickest portion registers 140°F, about 5 minutes. Remove from the oven; let stand 10 minutes. Serve with the pickled daikon and carrots.

Reprinted with permission from 100% Real: 100 Insanely Good Recipes for Clean Food Made Fresh by Sam Talbot. 

Hot Italian Sausage Sandwich

By MARIO BATALI   –   ABC.COM

Jalapeno Mustard Adds Spice to this Great Sandwich

ingredients
FOR THE JALAPENO MUSTARD:
  • 1/2 cup white wine
  • 1/2 cup white wine vinegar
  • 1/4 cup yellow mustard seeds
  • 1/4 cup brown mustard seeds
  • 2 tablespoons shallots (peeled and minced)
  • 1 jalapeno (minced)
  • 1 tablespoon Kosher salt
FOR THE PICKLED ONIONS:
  • 1 1/2 cups distilled white vinegar
  • 1 cup water
  • 1/2 cup sugar
  • 1 tablespoon Kosher salt
  • 2 large red onions (peeled and thinly sliced)
FOR THE HOT ITALIAN SAUSAGE:
  • 2 tablespoons olive oil
  • 4 hot Italian sausage links (butterflied open)
  • 1 head radicchio (quartered lengthwise with root end attached)
  • 4 slices pepper jack cheese
  • Kosher salt and freshly ground black pepper
FOR THE SANDWICH:
  • 4 hoagie rolls (lightly toasted)
directions
  • For the Jalapeno Mustard: >In a small bowl combine the wine, vinegar, yellow and brown mustard seeds, shallots, jalapeno and salt. Allow to steep overnight. Lightly puree and store in an airtight jar until ready to use.
  • For the Pickled Onions: In a medium sauce pot, combine the vinegar, water, sugar and salt and bring to a boil. Add the sliced onions to a large heatproof bowl and pour the hot vinegar mixture over the top. Allow to stand at room temperature until cool. Transfer to a glass jar until ready to use.
  • For the Hot Italian Sausage: Heat a griddle to medium high heat. Toss the sausage links with olive oil and place on the hot griddle, cook until charred. Toss the radicchio with olive oil, salt and pepper and cook until charred, about 3 minutes. Top each sausage link with a piece of cheese and continue cooking until melted. Remove from the griddle and keep warm. Slice the radicchio and set aside.
  • For the Sandwich: Spread the jalapeno mustard on the top and bottom of the toasted rolls, top with a link of sausage followed by the pickled onions and charred radicchio. Serve immediately.
  • Tip: Throw an ice cube on your griddle and cover with a metal bowl to create a steam bath to melt the cheese.
Similar categories: Sandwiches Italian


Pimento Grilled Cheese

Your favorite sandwich, with a Southern twist

BY JAKE COHEN   –   Tasting Table

Photo: Rachel Vanni/Tasting Table

We’re no strangers to a good grilled cheese sandwich. From a bagel grilled cheese to one filled with ricotta and berries, we’ve seen, and happily eaten, it all. But when Sam Talbot opened Pretty Southern in Brooklyn, we fell hard for another grilled cheese. Homemade pimento cheese is stuffed between focaccia (they call their thin version “magic bread”) with tomatoes and pickled jalapeños for a spicy and cheesy sandwich that’s beyond addictive.

We love this pimento cheese on its own, too, so feel free to make a few grilled cheeses and put out the rest with some crudités and crackers. But if you’ve never experienced this Southern staple warmed between two pieces of bread, brace yourself.

To learn more, read “Spread the Love.”

Pimento Grilled Cheese

Recipe adapted from Sam Talbot, Pretty Southern, Brooklyn, NY

Yield: 4 sandwiches

Prep Time: 15 minutes

Cook Time: 10 minutes

Total Time: 25 minutes

INGREDIENTS

For the Pimento Cheese:

4 ounces extra-sharp cheddar, coarsely grated

4 ounces white cheddar, coarsely grated

1 cup drained pimento or roasted red peppers, finely chopped

½ cup mayonnaise

2 tablespoons Dijon mustard

2 tablespoons hot sauce

1½ tablespoons dried parsley

1 tablespoon Worcestershire sauce

½ tablespoon lemon juice

¼ yellow onion, finely grated

Kosher salt and freshly ground black pepper, to taste

For the Pimento Grilled Cheese:

Four 6-inch focaccia rolls, halved

20 pickled jalapeño slices

2 vine-ripe tomatoes, thinly sliced

Pimento cheese

1 stick unsalted butter, divided

DIRECTIONS

1. Make the pimento cheese: In a large bowl, stir all of the pimento cheese ingredients until smooth.

2. Make the grilled cheese: Preheat the oven to 400° and place a wire rack on a sheet pan. Lay out the bottoms of the focaccia rolls on a cutting board and top each with 5 pickled jalapeño slices. Divide the tomato slices among the bottoms, followed by the pimento cheese, then add the tops of the focaccia rolls, and press to close.

3. In a large cast-iron skillet, heat 2 tablespoons of the butter over medium heat. Place 2 of the sandwiches in the pan and place a heavy pan on top to weigh them down. Cook until golden, 3 to 4 minutes. Flip the sandwiches, add 2 more tablespoons of butter and cook, replacing the pan on top, until the other sides are golden, 3 to 4 minutes. Transfer the sandwiches to the prepared sheet pan and repeat this process with the remaining sandwiches and butter.

4. Bake the sandwiches in the oven until the cheese is completely melted, 5 minutes, then cut each in half and serve.

Old-Fashioned, Crunchy, Fermented Garlic-Dill Pickles

By

Pickles are one of my favorite ferments!

In this video, you’ll see beautiful fermented Garlic-Dill Pickles. They are so easy to make at home.

And by the way…

These are NOT your regular vinegar pickles you’ll find in the grocery store.

Nope!

Instead, these are fermented with salt. Once pickled, there’s an explosion of vitamins, enzymes, probiotics, beneficial acids, and most importantly… a delicious crunch!

These are so good, and they’re really easy to make!

Here’s the video, and below that is the written out recipe…

By the way, in the video I mentioned this FREE Fermenting Formulas Cheat Sheet — it’s a gift from me to you. Here’s a link to grab it.

Fermented Garlic-Dill Pickles

These pickles are fermented with salt for an explosion of vitamins, enzymes, probiotics, beneficial acids, and most importantly… a delicious crunch!
Makes 1 gallon pickles in this 1-gallon stoneware crock from Ohio Stoneware.
Author: Wardee Harmon
Recipe type: Cultured, Snacks
Ingredients
  • pickling cucumbers (or thin-skinned Mediterranean cucumbers) — enough to fill the crock (I needed a few dozen) and as fresh as possible
  • ½ gallon good water (filtered if municipal water)
  • 6 tablespoons unrefined sea salt
  • 12 peeled garlic cloves (optional, for flavor)
  • 4 teaspoons dill seed (optional, for flavor)
  • 1 teaspoon black tea leaves (or a few fresh grape or oak leaves)
Instructions
  1. Submerge cucumbers in cold water for 10 to 30 minutes to crisp them up.
  2. Meanwhile, make the brine by combining the water and sea salt.
  3. Stir well to dissolve the salt.
  4. Cut the ends off each cucumber.
  5. Start packing the crock with cucumbers.
  6. Every so often, sprinkle in some dill seeds, a few cloves of garlic, and some black tea. If you’d prefer, omit the dill seeds and garlic and add celery seed or peppercorns, etc. instead.
  7. Keep packing the cucumbers, stopping to sprinkle more of the other ingredients along the way.
  8. When the crock is full to within 3 to 4 inches of the top, stop adding ingredients.
  9. Pour the brine over all of it so the cucumbers are submerged.
  10. Place the stone weights on top — they will make sure the cucumbers stay below the surface of the brine.
  11. Add the lid of the crock.
  12. Now leave the cucumbers to ferment at room temperature for 3 to 7 days. (Shorter if temps are warmer; longer if cooler. In the video, it was winter and the house was cooler so I fermented these 4 to 5 days.)
  13. When they are done, remove the lid and plates/weights. It is completely normal to see bubbles at the top and also for the brine to get cloudy.
  14. Taste your pickles! They should be crunchy and salty. They may not be fully pickled through the entire cucumber but that’s okay. They’ll continue to “pickle” in cold storage.
  15. Transfer to a gallon sized glass jar and store in the fridge. You can eat them right away or let them age longer in the fridge. Enjoy!

More About The 1-Gallon Stoneware Crock

I used the 1-gallon stoneware crock kit from Ohio Stoneware in this demo.

Hands down, it’s one of my favorite kitchen tools. We ferment in it all the time — sauerkraut (video demo and recipe here), pickles, kimchi, and more.

I highly recommend it!

Thank you to Ohio Stoneware for providing it and for being such a wonderful supporter of fermented foods. ????

Tasty with a kick: Baked rice with jalapeño cheese

If you are not afraid of some spice in your food, try this tasty baked rice with jalapeño cheese recipe.

JOL Staff   –   JOL

Photo Credit: Yehuda Solomon

Tnuva USA is sharing a nice recipe that your whole family will love. This recipe makes six servings and will take you only about 20 minutes to prepare.

Ingredients:

A little bit of olive oil for greasing the pan

2 cups (300 grams) cool or cold cooked rice

4 large eggs

1 carton of Tnuva’s Creamy Soft Cheese 9%

100 grams of Tnuva’s Kashkaval Chunk, roughly grated

½ cup of cilantro, finely chopped

½ tsp. of dried jalapeño flakes or chili flakes

Salt and pepper to taste

200 grams small champignon mushrooms

Directions:

1. Grease 6 ovenproof containers of approximately 250 ml. each with olive oil. Place the containers on a large baking tray and preheat the oven to 180 degrees Celsius.

2. In a large bowl, mix the cooked rice with the eggs. Add the carton of creamy soft cheese, ¾ of the Kashkaval and the cilantro. Then, sprinkle with the chili flakes, salt and pepper and mix well.

3. Chop the champignon mushrooms into thick slices. Save the middle slice from each mushroom for the garnish and then roughly dice the rest of the slices and mix into the rice bowl.

4. Divide the mixture among the greased fireproof containers. Place three slices of mushroom on top of the rice in each container and then sprinkle the remaining Kashkaval on top, along with a few more chili flakes. Bake in the center of the oven for about 25-30 min until the rice has browned and its center is stable. Serve hot.

For more delicious Tnuva recipes, click here