PICKLES IN A BLANKET

PICKLES IN A BLANKET

A quick and easy snack or appetizer, these salty, savory, creamy bites of salami, herbed goat cheese and dill pickle are a big crowd pleaser.

Pickles in a Blanket by The Lemon BowlI am a huge fan of party snacks. When given the choice of a dessert table or an appetizer spread, I will always choose savory over sweet. Speaking of sweet… today I am so thrilled to be participating in a SURPRISE virtual baby shower for my beautiful friend Lauren of Keep it Sweet Desserts.

Lauren is expecting her first baby and I’m so excited that she’s having A BOY! I know I’m a little biased but I think boys are the best.

Lauren and I had the chance to meet face to face this past summer when I was visiting NYC for a couple days. We had so much fun walking, talking and eating out way through Chelsea Market.

Pickles in a Blanket - The Lemon BowlSince I knew Lauren’s friends would be baking tons of fabulous desserts for our virtual baby shower, I decided to make a savory appetizer to balance out the sugar. Pickles in a Blanket are such a fun and EASY party appetizer that is perfect as we head into the holidays and the busy entertaining time of year.

Pickles in a Blanket Appetizer - The Lemon BowlOf course, pregnant women love pickles in all forms but who doesn’t? Salty, crunchy and low calorie, these bites are delicious with a cocktail but frankly they make a somewhat healthy, high protein, low carb and gluten free snack any day of the year. Win Win.

Happy Baby Shower Lauren!! I can’t wait for your little one to make his debut into the world!

Pickles in a Blanket Appetizer - The Lemon Bowl
 

Pickles in a Blanket Appetizer Recipe

A fun and easy appetizer for any party, your guests will love these salty, savory, creamy bites of salami, herbed goat cheese and dill pickle.
 CourseAppetizer
 CuisineAmerican
 Keywordpickles in a blanket appetizer
 Prep Time15 minutes
 Total Time15 minutes
 Servings pieces
 Calories53kcal

Ingredients

  • 12 slices Genoa salami (thinly sliced)

  • 12 baby dill pickles (quartered)
  • 4 ounces Boursin cheese (I used garlic and fine herbs)

Instructions

  • To assemble, stack the salami slices and cut in half to create 24 half moons. Lay each half moon slice of salami out on a flat work surface or cutting board.
  • Using a butter knife, spread a small amount (1/2 teaspoon) of the cheese on each salami half starting in the center, middle.
  • Place a piece of pickle in the center of the salami on top of the cheese and tightly roll into a cone shape. Pierce with a toothpick to keep in place and arrange on a platter to serve.

Chef’s Notes:

There’s no right or wrong way to roll the salami – it will taste delicious no matter how it looks but I found the cone shapes to work well for presentation.

Serving Size is 4 pieces

Pickles in a blanket!

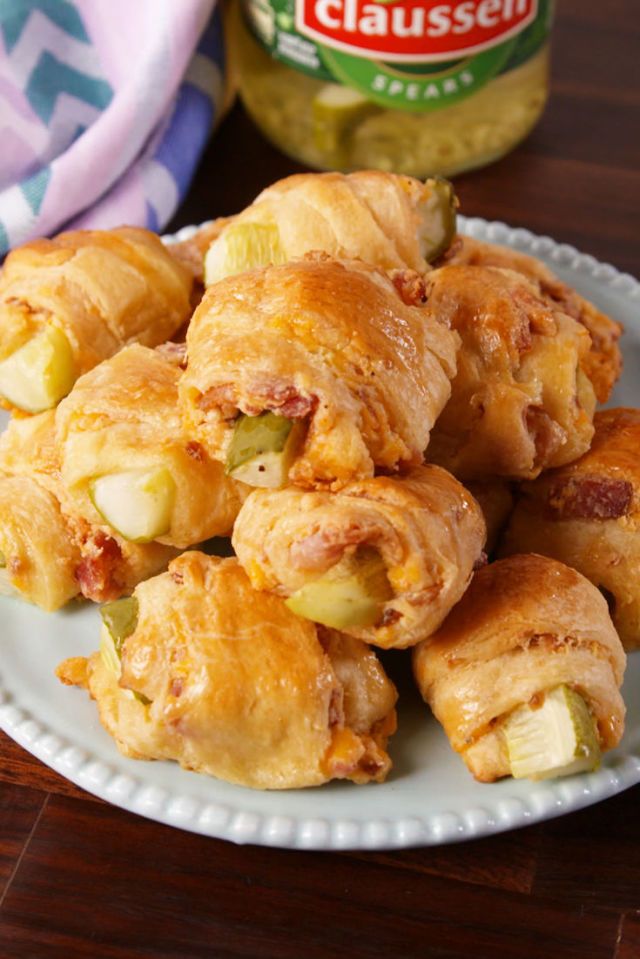
If you love pigs in a blanket for a party appetizer, just wait until you try PICKLES in a blanket. Filled with bacon, cheese, and a dill spear, these will be devoured in minutes.

Have you made these yet? Let us know how it went in the comments below!

YIELDS:16
PREP TIME:HOURS 15 MINS
TOTAL TIME:HOURS 45 MINS
INGREDIENTS
4 oz. cream cheese, softened
1 c. shredded cheddar
6 slices bacon, cooked and crumbled
1 tsp. garlic powder

Kosher salt

Freshly ground black pepper

1 tube crescent rolls

8 pickle spears, halved crosswise

Egg wash, for brushing

DIRECTIONS
  1. Preheat oven to 350º. In a medium bowl, combine cream cheese with cheddar, cooked bacon, and garlic powder. Season with salt and pepper and mix until fully combined.
  2. Unroll crescent rolls and cut each triangle in half lengthwise. Spread mixture on each triangle, then top with a pickle. Roll up.
  3. Brush with egg wash and bake until golden, 12 to 15 minutes.
CHELSEA LUPKIN
Deputy EditorLindsay Funston is a food editor who has more than 10 years experience tasting everything from pickles to bloody marys, writing about food trends, and creating easy recipes.

DILL PICKLE CHEESEBALL

DILL PICKLE CHEESEBALL (EASY APPETIZER)

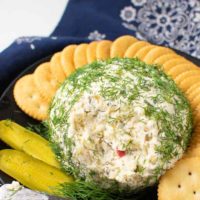
Any dill pickle lover is going to fall head over heels for this Dill Pickle Cheese Ball!  It’s the perfect appetizer recipe for any party and will remind guests of those yummy dill pickle ham rollups, but this is easier to make!

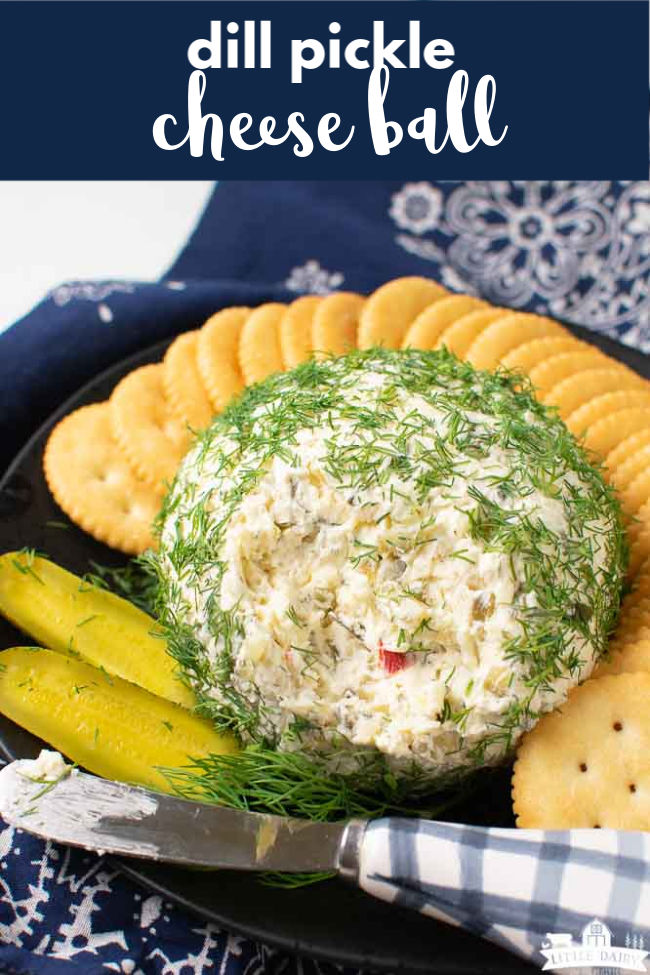
a cheese ball that's has a portion of it removed to show the inside of the cheese ball. On a black plate with round crackers and pickle slices

NOTE: This recipe was updated in 2020 to include new text and new images. The recipe was written with more clarity but it still has the same ingredients as before.

This past week has been beyond crazy! I ended up in the dentist’s office twice I think. My nine-year-old was playing king of the hill on an icy hill at the school. Apparently he was pushed off the hill and ended up breaking his front tooth in half. His permanent front tooth that he’s going to need for the rest of his life! Ya, that one!

Maybe I was most sad about it because he has the absolutely most adorable buck teeth in the world! After it happened, he even told me he just wanted his buck teeth back!

You know how doctors’ offices are right? They provide you an opportunity to look at every magazine you don’t subscribe to and scroll through all the social media channels you really don’t want to waste time on.

I must admit our dentist is awesome, but there is plenty of time to read magazines. The little wait turned out to be a good thing this time because that’s when I found a recipe for Dill Pickle Cheeseball! I knew I needed it in my life!

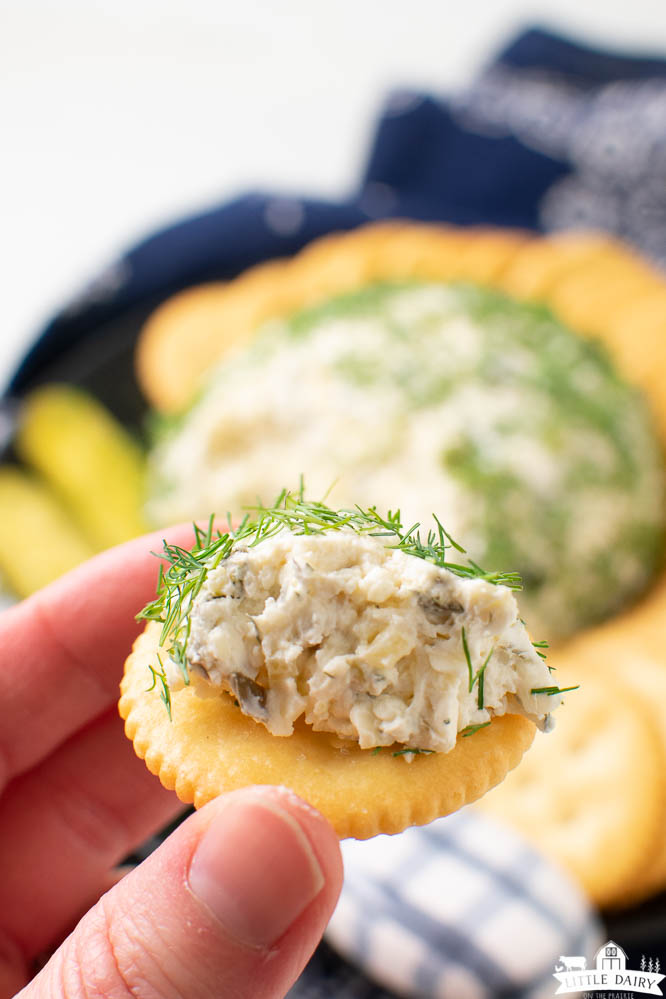
a round butter cracker topped with a piece of cream cheese dip and sprinkled with fresh herbs

Tips for making the BEST Dill Pickle Cheese Ball.

TIP #1: The recipe I found at the dentist’s office had dill pickles listed in the ingredients, which totally makes sense since this is a dill pickle recipe! I knew I didn’t want to fuss with chopping pickles so this recipe uses a jar of pickle relish.

TIP #2: Pickle relish has extra liquid in it, so be sure to drain the liquid off. I put it in a colander and let it sit for a few minutes.

TIP #3: Be sure to use room temperature cream cheese. Want to know the best way to get the cream cheese to room temperature? Pull it out of the fridge about minutes before you want to use it. Or, it can be defrosted in the microwave for about 30 seconds.

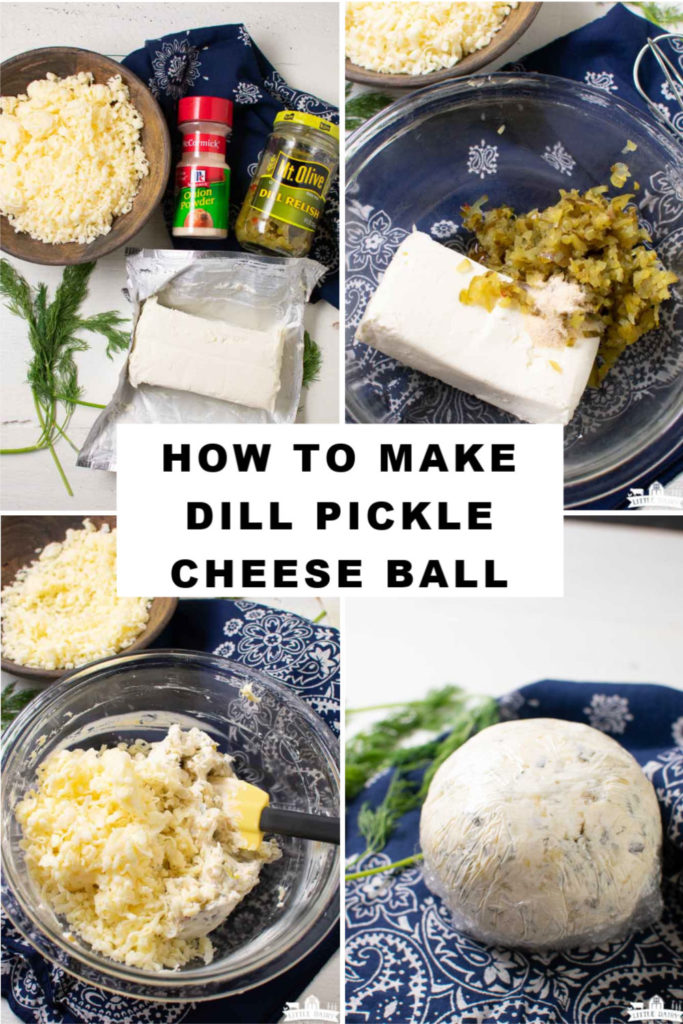
a collage with four images showing how to make a dill pickle cheese ball and the ingredients needed to make it.

How to make Dill Pickle Cheeseball.

It seriously takes about 5 minutes to throw this recipe together! And honestly, I think it took less time than that for our family to devour it!

Here are the steps.

  1. Mix cream cheese, dill pickle relish, onion powder, and Worcestershire together. You can stop right here and serve it just like it is as a dill pickle dip if you’d like! Yum!
  2. Wrap cream cheese mixture in a piece of plastic wrap and shape into a ball. This easiest way to shape cheese balls.
  3. Refrigerate for about 10-15 minutes.
  4. Remove from plastic wrap and sprinkle with chopped dill weed, or roll the cheeseball in dill weed.
  5. Set on a plate and serve, or cover with plastic wrap until you’re ready to serve it.
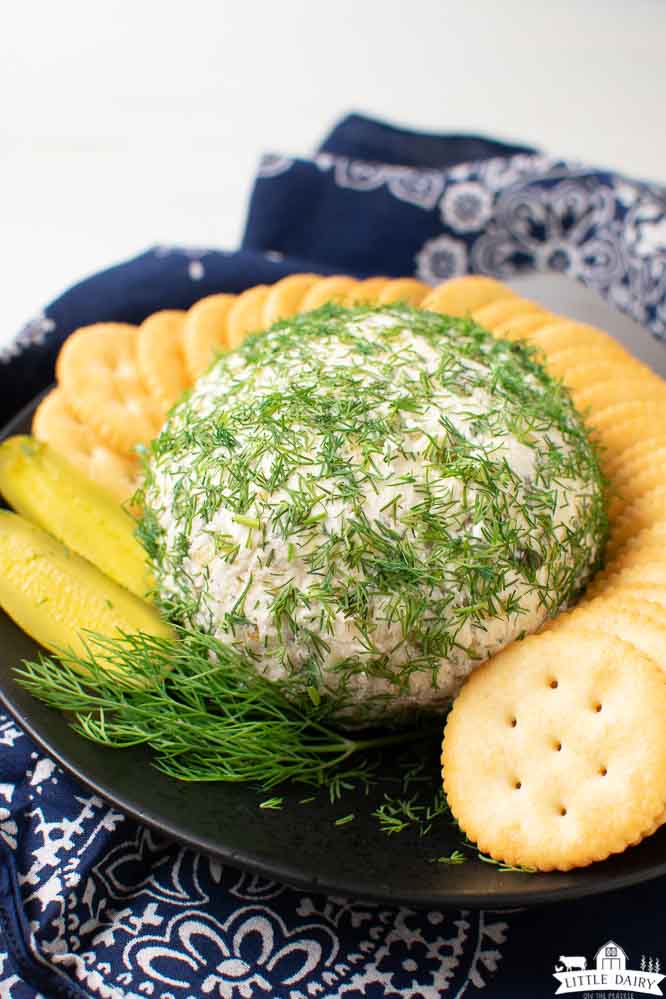
a cheeseball sprinkled with minced fresh dill weed, surrounded by butter crackers and pickle slices

What to serve with a Dill Pickle Cheese Ball?

This recipe really is a winner whenever you’re asked to bring finger foods for a party. It’s fun because there are lots of options for serving with it.

  • Butter crackers like Ritz, other crackers are good too
  • Serve it with carrots or celery sticks if you want to keep it low carb, or gluten free
  • Spread on a tortilla and wrapped up like those yummy dill pickle pinwheels or rollups from the fifties too!
  • Soften it in the microwave and spread it on a hamburger bun

Although I wouldn’t freeze this recipe it keeps for over a week in the fridge.

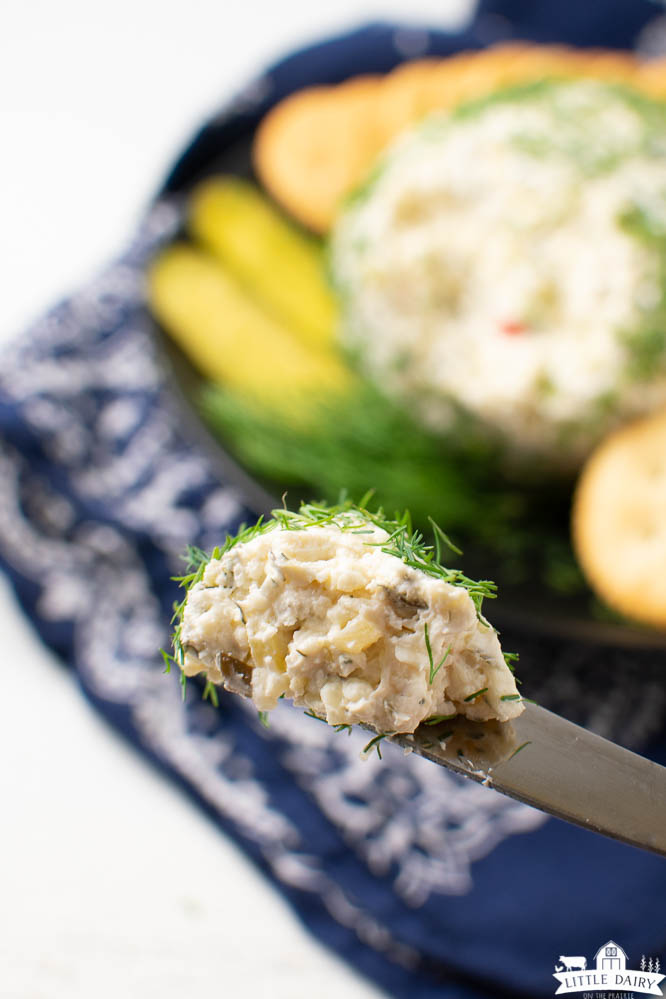
a knife with a serving a cheese dip on it sprinkled with fresh herbs

Fun variations for dill pickle cream cheese appetizers.

There fun ways to switch this recipe up to customize the flavors.

  • Cooked and crumbled bacon can be added
  • Chipped beef can be added
  • Chopped ham can be added
  • Pepper Jack cheese makes it a bit spicy
  • Use cheddar cheese for a classic flavor
  • Monterey Jack cheese is yummy
  • Add dill weed to amp up the pickle flavor
  • Use chopped pickles for bigger chunks of pickle
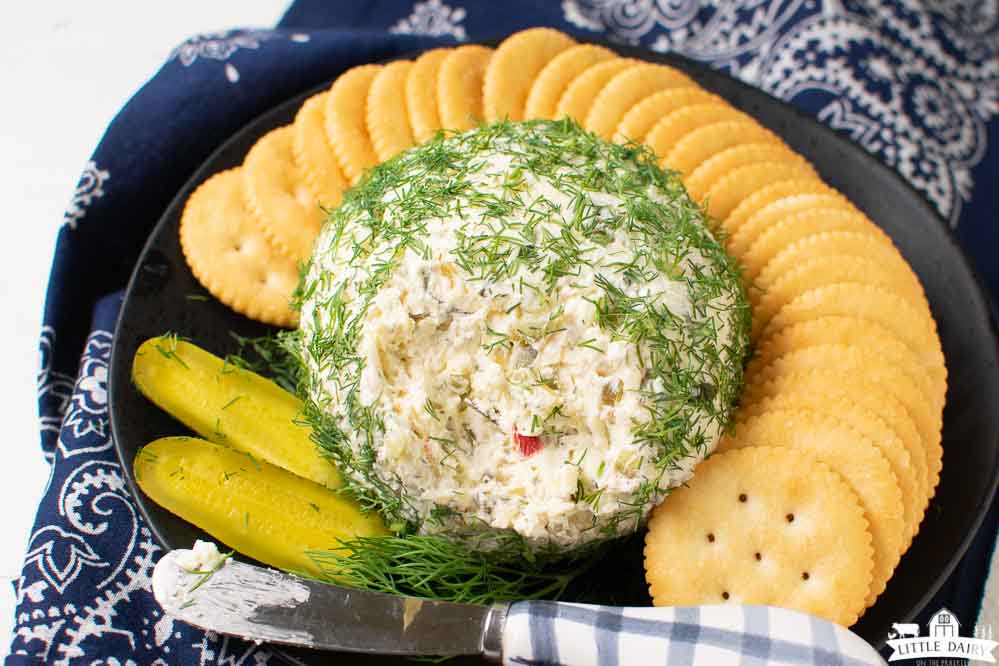
A black plate with a cheese ball covered with fresh dill weed and a knife for spreading cream cheese dip. Surrounded by Ritz crackers. Little Dairy on the Prairie
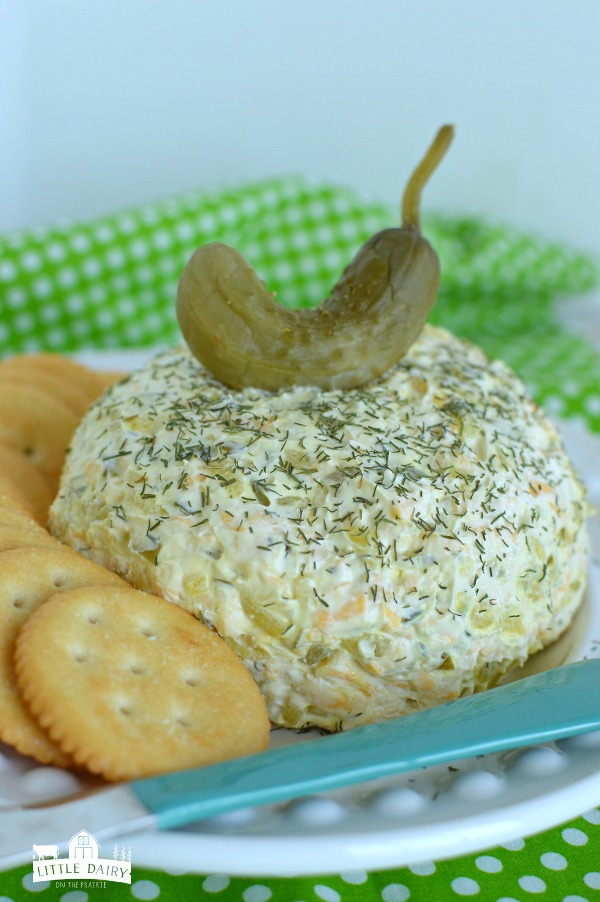
a cheese ball has a pickle sitting on the top with round butter crackers surrounding it.
I’m leaving an image from the first draft of this post, just in case you were looking specifically remembering this cheese ball recipe! It’s the same recipe with new images!

Grab the recipe!

My sister and I used to eat dill pickles every single day for lunch. So I guess you could say I’ve been a lover for a long time!

This cheese ball has always been a winning snack, appetizer, or party food with me! I’ve pretty much checked out all the dill pickle snack and recipe ideas and this one is at the top of my list! I just know you’re going to love it too!

Oh and be sure to sign up for my newsletter! You’ll get a sneak peek at what’s happening on the farm and get my new recipes!

a cheese ball made with dill pickle relish and covered with fresh dill weed, surrounded by butter crackers and a pickle slice.

Dill Pickle Cheeseball (Easy Appetizer)

Dill Pickle Cheese Ball is just right for the pickle lovers in your life! It’s easy to make and always a huge hit at parties, tailgating, for a snack, or any other time!
3.43 from 7 votes

 Print  Pin  Rate

Course: Appetizer, Finger Foods, starters
Cuisine: American
Keyword: Dill Pickle Appetizer Recipes, Dill Pickle Cheese Ball
Prep Time: 15 minutes
Chilling Time: 1 hour
Total Time: 1 hour 10 minutes
Servings: 20 servings
Calories: 83kcal
Author: Amy

Ingredients

  • 8 ounces Cream cheese Room Temperature
  • 1 cup Dill pickle relish drained
  • 1 Tbsp Worcestershire Sauce
  • 1/2 tsp Onion powder
  • 1 1/2 cup Grated Cheese I used colby jack
  • 2 tsp Dill weed Fresh is best

Instructions

  • Mix room all ingredients except grated cheese.
  • Stir in grated cheese
  • Form into a ball.
  • Refrigerate for about 15 minutes.
  • Sprinkle with chopped dill weed, or roll cheese ball in dill weed.
  • Serve, or refrigerate until serving time. If you want the cheese ball to be firm refrigerate for an hour before serving.

Notes

NOTE: Cooked and crumbled bacon, chopped ham, or chipped beef may be added.

NOTE: Other varieties of cheese may be used. Pepper Jack or Monterey Jack are both good choices.

NOTE: Serve with crackers, carrots, or celery sticks.

Nutrition

Calories: 83kcal | Carbohydrates: 4g | Protein: 4g | Fat: 6g | Saturated Fat: 3g | Cholesterol: 19mg | Sodium: 293mg | Potassium: 41mg | Fiber: 1g | Sugar: 1g | Vitamin A: 238IU | Vitamin C: 1mg | Calcium: 96mg | Iron: 1mg
Tried this recipe?Mention @littledairyontheprairie or tag #littledairyontheprairie!

Do You Know Your Tsukemono? A Guide to Japanese Pickles

Do You Know Your Tsukemono? A Guide to Japanese Pickles

Published:  Last Updated: 
20140520-tsukemono-tsukemono.jpg

A collection of Japanese pickles. [Photographs: Miki Kawasaki]

It’s often said that a Japanese meal is built around three core foods: rice, soup, and pickles. Rice, plain and filling, is the main staple, so significant to the national cuisine that scarcely a meal goes by without it. Soup, miso-enhanced or otherwise, provides the comforts of umami—the appeal of a rich dashi broth is easy to understand. But pickles, in contrast, are a little less straightforward in their virtues. Tart, pungent, and often imbued with funky overtones, they are best enjoyed in small bites. In the context of the larger meal, they practically traverse the boundary between side dish and condiment.

Japanese pickles—known collectively as tsukemono—can easily go unnoticed as part of a washoku (traditional Japanese) meal. Yet they’ve rightfully earned their place as a cornerstone food because they serve an important purpose: Japanese food culture is heavily influenced by principles of balance handed down from kaiseki (the national haute cuisine). These principles suggest that a meal should contain a variety of colors, flavors, and cooking methods while taking into account sensory and aesthetic considerations. Tsukemono help create this harmony. They cleanse the palate and provide piquancy to counter the heaviness of umami-rich foods. Available in a number of bright hues, they also help fulfill the general rule that a meal should contain five colors: black, red, green, white, and yellow. And although they are altered by the processes of pickling, tsukemono are still considered to be raw. Think of them as salads with the added benefits of lactic-acid fermentation.

One further quality of tsukemono is that they are very much “transformed” foods, altered by the processes of pickling to the point where they barely resemble the fresh produce from which they are made. Many of the them are colorful and visually attractive, but hard to identify if you aren’t intimately familiar with Japanese cuisine. It’s entirely possible that you’ve had noodles topped with bright red beni shoga or curry rice with a side of chutney-like fukujinzuke and not quite known what those tangy bits and pieces were.

To guide you on your future travels through the world of traditional Japanese cuisine, we’ve pulled together some of the tsukemono you might encounter and the dishes they’re typically served with. While this list hardly represents the full range of pickles you can find in Japan—there are countless varieties and regional specialties—you’re likely to find these served with many of the the more well-known Japanese dishes, and even available for purchase in many Asian grocery stores.

Gari

20140520-tsukemono-gari.jpg

Gari is probably the most widely known tsukemono because it is often served as a palate cleanser alongside sushi. The best gari is made with young ginger, which is naturally pink-hued around the edges—when brined, the slices take on that distinctive blushing color. Most commercial versions, however, use mature ginger, which is either left tan or dyed red with shiso leaf or artificial colorants.

How it’s made: Thinly sliced ginger is pickled in an amazuke marinade of sugar, salt, and rice vinegar for anywhere from a few hours to a couple weeks.

How it tastes: Clean and grassy, with sweet and peppery notes.

Serve it with: Sushi and sashimi or fried rice; the brine also makes a suitable dressing for salads and vegetables.

Takuan

20140520-tsukemono-takuan.jpg

Takuan is a crunchy daikon pickle named for the Zen monk credited with its invention. It’s distinguished by its bright yellow color, which can be achieved through the cultivation of bacillus subtilis bacteria during fermentation, heightened by the addition of persimmon peels, nasturtium flowers, or other coloring agents.

How it’s made: Daikon is sun-dried and salted before being placed in a container with nukadoko, a rice bran-based fermenting medium rich in bacillus subtilis. It’s then left to sit for anywhere from a few weeks to a few months.

How it tastes: Mildly tart and citrusy with a slight funk.

Serve it with: Plain rice, in bento boxes, and in maki rolls, either on its own or with fatty tuna. It’s also popular in Korea (where it’s known as danmuji), appearing inside kimbap rolls or with jjajangmyun (black bean noodles).

Umeboshi

20140520-tsukemono-umeboshi.jpg

Umeboshi are pickled plums known for their bracing saltiness and acidity—they’re so strong, they’ve been said to corrode aluminum lunch boxes. That intensity lends itself well to a number of handy uses. Samurai prized them as a means of combatting fatigue on the battlefield, likely because of the welcome jolt to the senses they provided. Even today, they’re recommended as a morning pick-me-up, defense against aging, cure for nausea, and remedy for hangovers.

How it’s made: Umeboshi making is associated with June, when both Asian plums and red shiso (which is used to color them) are ready to be harvested. They are potted with salt under a heavy weight during the summer rainy season (late June and July), exuding a briny liquid called umezu. Once the hot, dry days of August roll around, the umeboshi are allowed a few days to dry out in the sun. They are then repotted with a bit of the umezu and stored for a year or longer before eating.

How it tastes: Piercingly sour and salty, with a fleshy texture.

Serve it with: Onigiri (rice balls wrapped in nori); in bento boxes, an umeboshi placed in the center of a bed of plain rice is called a hinomaru, after the name for the Japanese flag; they can also be puréed into a paste, which makes a great maki roll filling with mountain yam and shiso leaf.

Beni Shoga

20140520-tsukemono-beni-shoga.jpg

There’s a strong ethos throughout Japanese cooking of recycling ingredients and creating as little waste as possible. Beni shoga, bright red slivers of ginger, are one such example of ingredient reuse. They are made with umezu, the leftover brine from making umeboshi. Although some commercial varieties get their color from the added boost of artificial dyes, homemade beni shoga can turn a mesmerizing hue simply from the addition of the red shiso-tinted umezu.

How it’s made: Ginger is julienned and left to brine in umezu for anywhere from a few hours to a few days.

How it tastes: Zesty with a concentrated ginger flavor.

Serve it with: Tonkotsu ramenokonomiyaki, yakisoba.

Shibazuke

20140520-tsukemono-shibazuke.jpg

A specialty of Kyoto, shibazuke is a mix of chopped cucumbers and eggplant that has been salted and brined with red shiso. It has a stunning purple-magenta hue that renders the vegetable pieces nearly unrecognizable from their original forms.

How it’s made: Historic recipes call for brining shibazuke for up to a year, but generally the pickles are made by letting them sit in salt until most of the liquid has leeched from the vegetable and the color has permeated throughout, which takes about a month.

How it tastes: Crunchy, crisp, and acidic, with a strong herbal note from shiso.

Serve it with: Plain rice, or with a few other tsukemono as a palate cleanser between bites.

Kyurizuke

20140520-tsukemono-kyuri.jpg

Long, firm Japanese cucumbers, which have fewer and smaller seeds than their Western counterparts, are used to make many different types of tsukemono. These include cucumber pickles made with rice bran or miso, as well as asazukelightly seasoned quick pickles. One cucumber tsukemono you’re likely to find in Japanese grocery stores is aokyurizuke, which is marinated in soy sauce.

How it’s made: Japanese cucumbers are brined in a mix of soy sauce, salt, and sugar for one to two weeks until they have shrunk considerably and have a firm crunch.

How it tastes: Savory and salty, with a deep soy sauce flavor.

Serve it with: Donburi (rice bowls topped with meat), or in ochazuke (a dish made by pouring green tea over rice).

Fukujinzuke

20140520-tsukemono-fukujinzuke.jpg

Fukujinzuke literally translates to “lucky god pickles,” which is a reference to a Japanese myth about the seven gods of fortune. Some varieties accordingly contain seven different vegetables in homage. Although individual recipes vary, most contain lotus, daikon, eggplant, and cucumber. Some versions are tinted red with shiso.

How it’s made: The chopped vegetables are marinated in a mixture of soy sauce and sugar overnight or longer.

How it tastes: Sweet and chutney-like.


Dill Pickle Pizza Anyone?

The Internet Remained Calm About This Dill Pickle Pizza. Just Kidding.

Honestly, it sounds great.

image

FACEBOOK

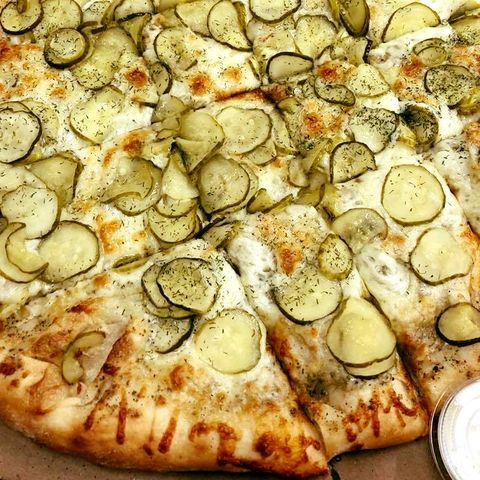
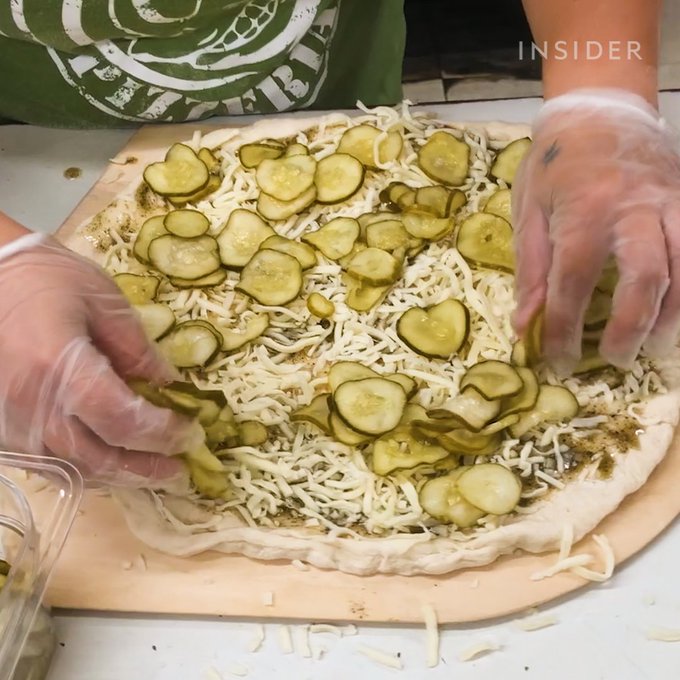
The Internet is mad at a pizza. The pizza in question is a dill pickle pie from Rhino’s Pizzeria in upstate New York. The crust is covered in homemade garlic sauce instead of marinara, there’s a layer of mozzarella cheese, and it’s topped off with a heaping helping of dill-seasoned pickle slices. And Pizza snobs can bite their tongues about superior New York slices and Chicago-style deep dish: According to Food Insider, which posted the now-viral video, the pizzeria sells about 30 dill pickle pizzas a day. Sounds like a winner.

Food Insider

@InsiderFood

This pizza is covered with pickles 👀

Embedded video

199 people are talking about this

But here we are, still getting mad.

Gigi ☾ ♒︎@Gbodonn

So y’all will eat this but not pineapples on pizza…. ok den https://twitter.com/InsiderFood/status/1042722537799602177 

Food Insider

@InsiderFood

This pizza is covered with pickles 👀

Embedded video

30 people are talking about this

Honestly, dill pickle pizza sounds fucking delicious. Even better is the optional ranch dipping side. As all good Americans know, ranch dressing is best used for dunking pizza crust. And if you feel like giving this trend a go at home, our friends at Delish have a recipe for bacon pickle pizza.

Let this be a reminder that all pizza is good pizza, even Hawaiian pizza.

Sarah Rense is the Associate Lifestyle Editor at Esquire, where she covers tech, food, drink, home, and more. 

MALO’S BEEF AND PICKLE TACOS

MALO’S BEEF AND PICKLE TACOS

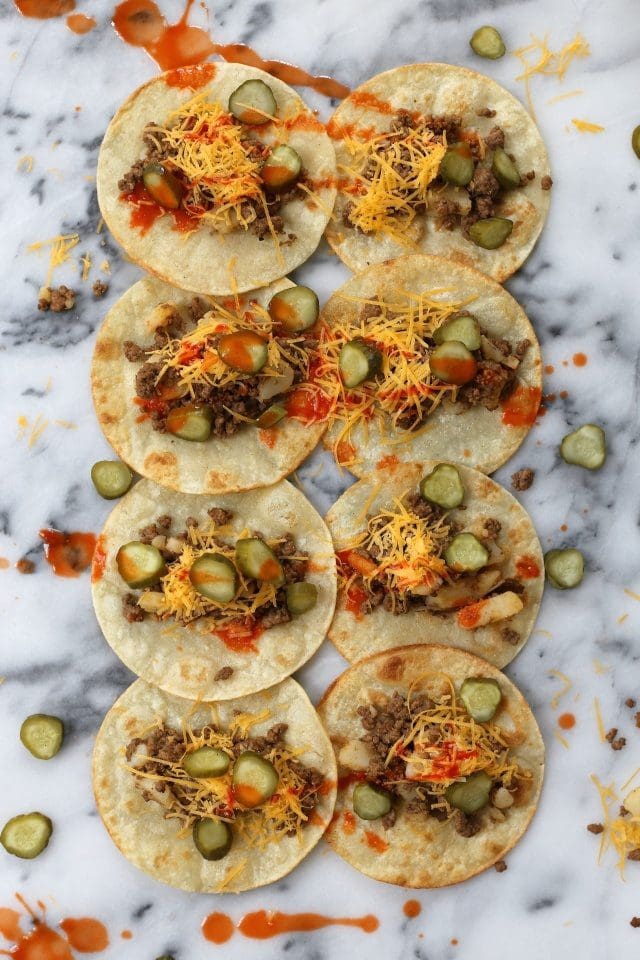
Malo's Beef and Pickle Tacos

There’s a place in Los Angeles where you can drink feisty margaritas made by half-rude actor/bartenders, munch on half-bad chips and salsa, and watch awkward Tinder dates buzz around you.  It’s happy hour, half-dark at your table, and there is tequila, so… most anything is tolerable.

The bright spot, the salvation from the meh bartenders and awkward dates around you, the comfort supreme:  Beef and Pickle Tacos!    Crunchy, salty, and cheesy.  Simple flavors and textures combine to make everything right in the world.  Well.. not everything, but most things.  The wonders a pickle can provide.

See:  Peanut Butter and Pickle Sandwich

Malo's Beef and Pickle Tacos

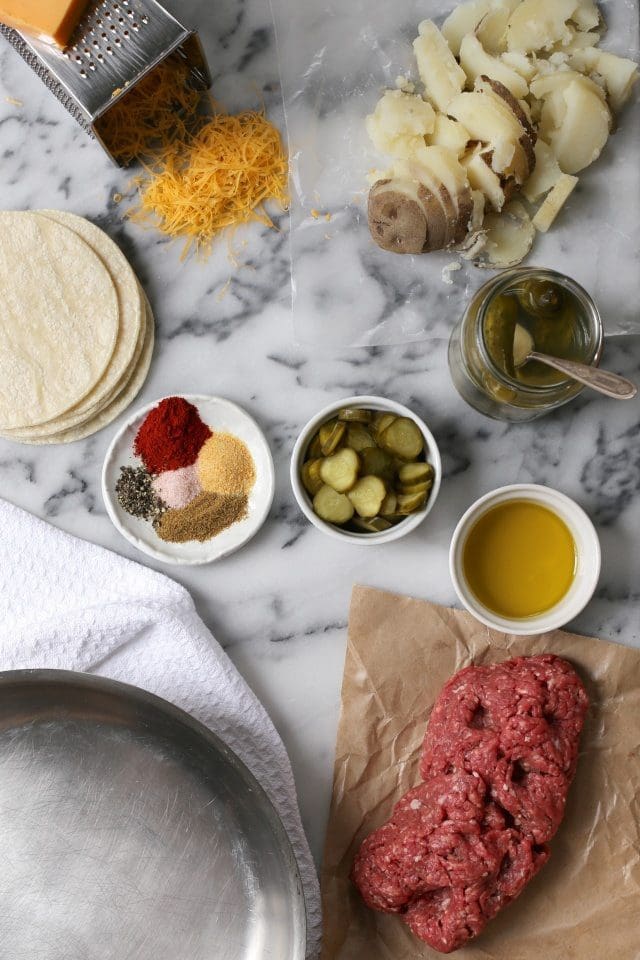
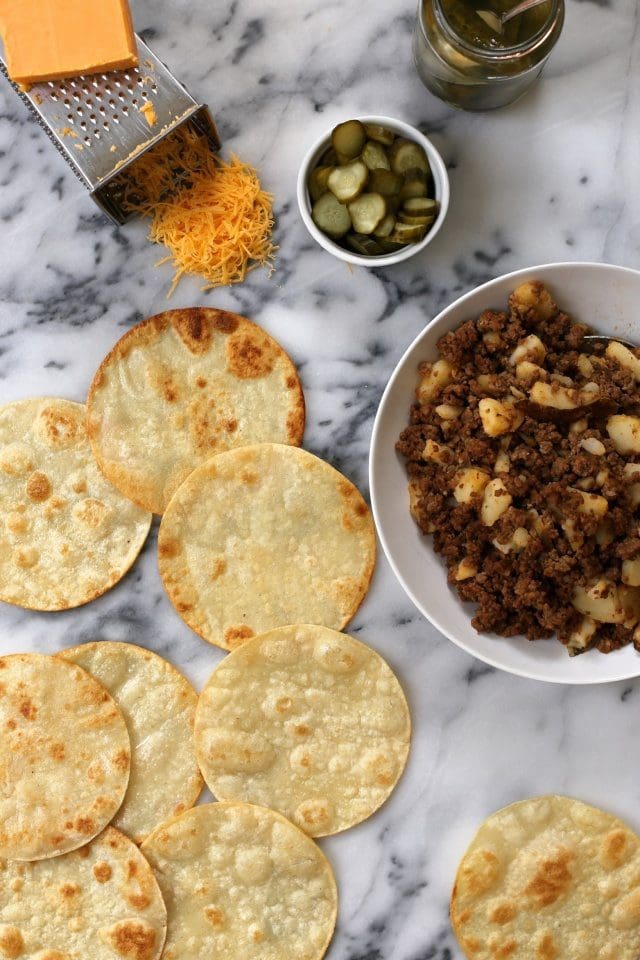
Here’s what we’ll need for taco dinner, at home, where it’s cozy.

Ground beef:  lean is cool.

A big ol’ boiled Russet Potato:  help extend the meat with cheap potato starch.

Sharp cheddar cheese: finely shredded

Kosher dill pickles:  sliced and snacked on.

Spices:  cumin, garlic powder, sea salt, black pepper, and smokey paprika.  It’s like making your own taco seasoning.  Extra delicious.

Tequila:  a sip for us and for good measure.

While you’re at it… maybe make a full jar of taco seasoning for future taco adventures?  Yes:  Taco Seasoning + Charred Corn Tacos.

Malo's Beef and Pickle Tacos

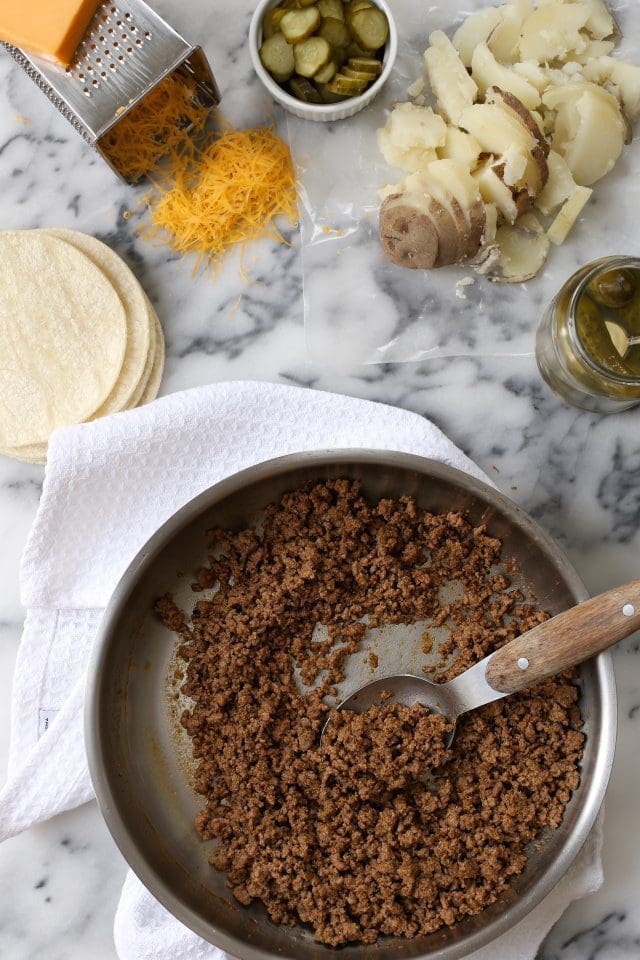
Ground beef is browned until cooked through.  Spices are added and the mixture becomes fragrant and flavorful.  Good spice.  Add salt and pepper to taste.  Don’t be shy, we’re adding a potato to the mix that will such up lots of flavor, too.

Malo's Beef and Pickle Tacos

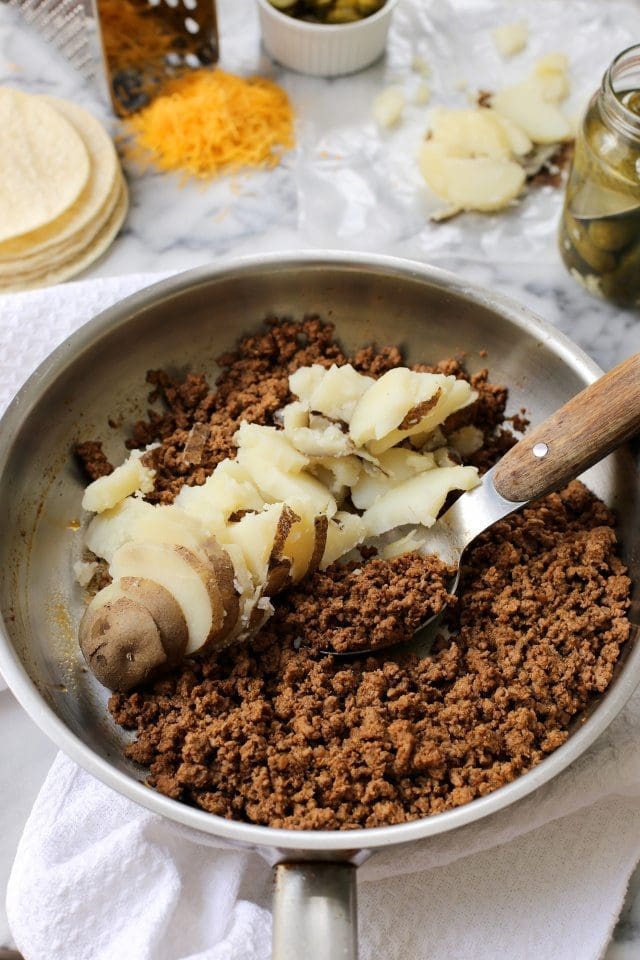
A boiled potato (skin on and coarsely chopped) is added to the seasoned beef mixture.  Stirring the potato into the taco meat will break the potato down perfectly.  No need to formally dice it.

Malo's Beef and Pickle Tacos

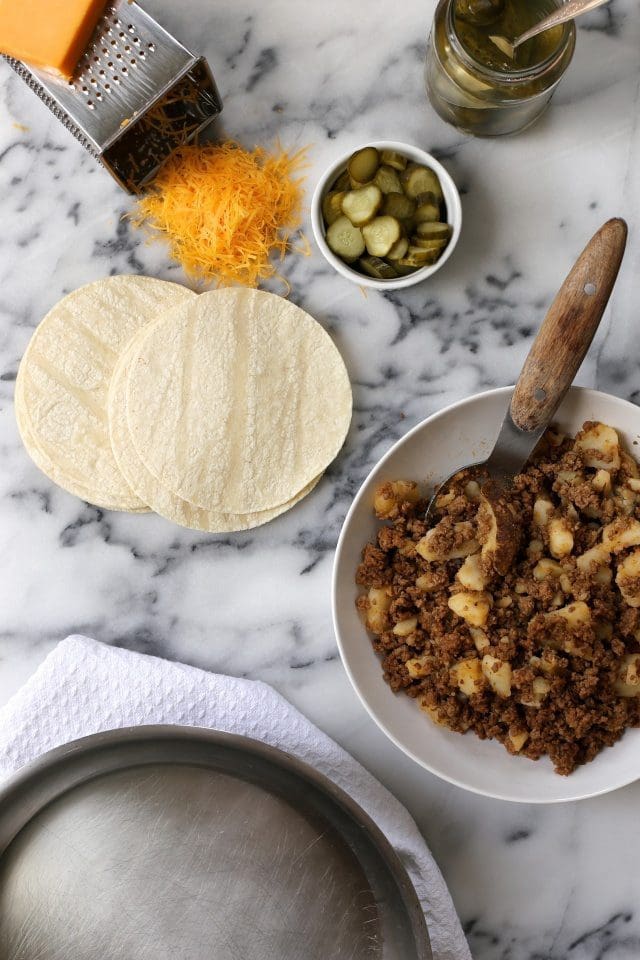
The meat mixture is browned and just slightly crisp and now it’s time to fry the corn tortillas! I like to pan-fry my tortillas in a bit of oil.  Feel free to char them over an open flame if your prefer a more fresh, less fried taco.

ps.  These tacos are really good with a little fry action.

Malo's Beef and Pickle Tacos

Crisp tortillas and it’s time to assemble.

Ready the pickle slices.  Grate some extra cheese.  More is more when it comes to these tacos.

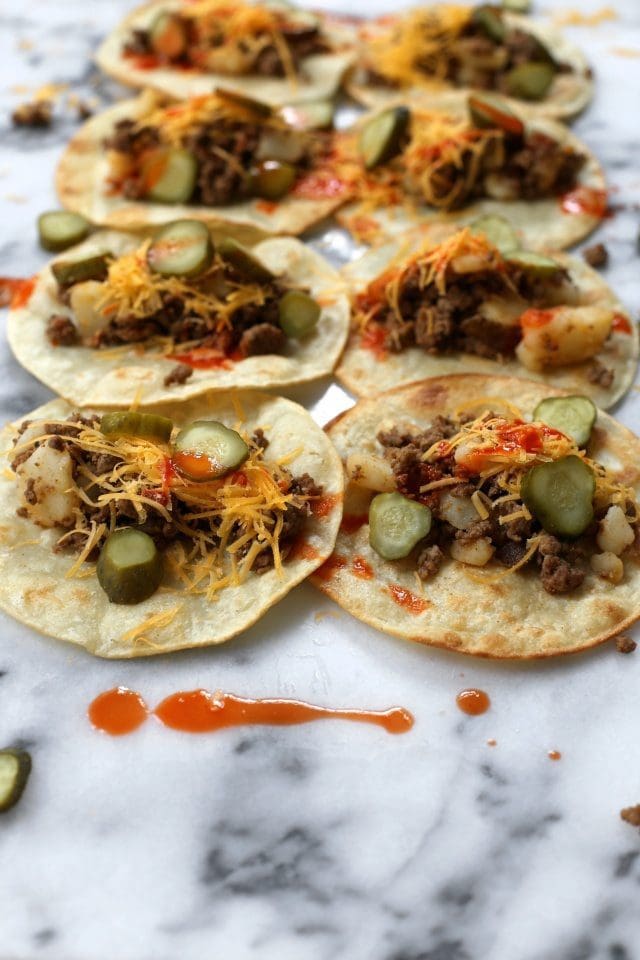
Malo's Beef and Pickle Tacos

These tacos are crispy and spicy, savory and salty.  The pickles add just the right amount of salty crunch.  Like pickles on a cheeseburger, in a taco, with hot sauce.

I consider this comfort food and I’d like some privacy while I eat waaaay too much.

PRINT

MALO’S BEEF AND PICKLE TACOS

  • Author: Joy the Baker

INGREDIENTS

  • 1lb ground beef
  • 3-4 tablespoons olive oil
  • 1 large boiled russet potatoes, peel left on, sliced
  • 1 heaping teaspoon garlic powder
  • 1 heaping teaspoon ground cumin
  • 1 heaping teaspoon dry oregano
  • 2 tablespoons paprika (I used smoky paprika)
  • Salt and pepper to taste
  • Corn tortillas
  • Canola oil for frying tortillas
  • Kosher dill pickle slices
  • Finely grated cheddar cheese
  • Hot sauce

INSTRUCTIONS

  1. In a medium saute pan over medium heat, sauté ground beef in olive oil until browned through. Use a spoon or spatula to break the ground beef up as it cooks.
  2. Add all the dry spices and cook for 3 minutes more making sure that the ground beef is cooked though completely.
  3. Add the sliced potatoes and toss to combine. Remove from heat and place in a bowl. Clean the saute pan.
  4. Add a few tablespoons of canola oil to the saute pan and place over medium heat until oil heats through. Fry tortillas until each side is crisp and lightly golden brown. Drain tortillas on a paper towel.
  5. To serve, spoon beef mixture into fried tortillas. Add a few slices of kosher pickles and grated cheese. Add hot sauce. Fold and enjoy!

This pickle milkshake recipe will satisfy your sweet and salty cravings at the same time

Brittni Brown

February 02, 2018 4:18 pm
HELLOGIGGLES

If you’ve ever heard of the food mashup involving pickles and ice cream, you probably expect it to come from a pregnancy craving. Lately though, one of the biggest trends is to combine all kinds of unique ice cream flavors. There’s activated charcoal, olive, and goat cheese and even, yum, bacon-flecked ice cream. If you’re into trying new and interesting sweet and savory foods, or if you’re ride or die for pickles, this is the sweet-salty treat for you.

Trendy ice cream cones are all the rage, but what about trendy milkshakes? Time to get creative with pickles and some ice cream. Watch the video below and make it yourself. Who knows, you might even get a craving for it.

Pickle Milkshake

Serves: 1 (serving size: 12 oz.)
Active 20 mins. Total 5 hours, 20 mins.

Ingredients:

2 cups heavy cream
3/4 cup whole milk
3/4 cup granulated sugar
4 large egg yolks
1 bay leaf
1 Tbsp. vanilla extract
1 cup bread-and-butter pickle juice, divided
1/4 cup chopped bread-and-butter pickles, plus whole pickles for garnish
2 drops neon green food coloring gel
Whipped cream
Fresh dill (optional)

Directions:

1. Whisk together cream, milk, sugar, egg yolks, and bay leaf in a medium saucepan over medium; stir constantly until slightly thickened, about 15 minutes. Transfer mixture to a bowl and let cool completely, about 30 minutes. Stir in vanilla extract and 3/4 cup of the pickle juice. Pour through a fine mesh strainer into a bowl; discard solids. Chill completely, about 1 hour.
2. Pour into a freezer container of a 2-quart electric ice cream maker, and freeze according to manufacturer’s instructions. Transfer custard to a 9- x 5-inch loaf pan, and return to freezer until ready to use.
3. Scoop 1 1/2 cups of the pickle ice cream into a blender. Add chopped pickles, food coloring, and remaining 1/4 cup pickle juice to blender, and blend until smooth, about 20 seconds. Pour mixture into milkshake glass. Garnish with whipped cream, whole pickles, and, if desired, dill.

Eat This: Pickle Sandwich by Elsie’s

Eat This: Pickle Sandwich by Elsie’s

Welcome visitors from Thrillist and other sources. This is an article I wrote about Elsie’s Pickle Sandwiches before it went viral. I was one of the first to try them and I instantly knew they’d be a hit. They really are fabulous!

Elsie’s, formerly Elsie’s Down the Shore, may not have invented the pickle sandwich, but they’re determined to popularize it. The former Linwood deli, owned and operated by Katherine J. Cohen Jordan and her husband Chad, is now based in Oaklyn, NJ as a catering business with possible plans for a brick and mortar down the road.

Update: The brick and mortar in Haddon Township is now open!

Pickle Sandwich by Elsie's

What is a pickle sandwich?

Simply, it’s very much like a traditional deli sandwich, but a juicy, half-sour pickle that is cut in half with the inside and seeds scooped out takes the place of bread, rolls, etc.

In this case, Elsie’s Signature Pickle – an extra large pickle they have custom made for their sandwich creations. Another thing that sets these pickle sandwiches apart are the ingredients. They roast their own beef for roast beef sandwiches and turkey for turkey sandwiches, making them truly fresh and high-quality. Even the tomatoes are the ripest and the lettuce is extra crisp. They make all of their salads (tuna, chicken) and hummus for vegetarian pickle sandwiches. Everything is virtually homemade.

Roast Beef Pickle Sandwich by Elsie's

Why eat a pickle sandwich?

First of all, pickles are healthy and delicious. If you’re on a low-carb or keto diet, you can eat this sandwich. If you’re gluten-sensitive, you can eat this sandwich. Not a fan of pickles? No problem. Order a lettuce wrap sandwich instead. They also offer a vegetarian and vegan-friendly sandwich with homemade hummus and veggies. Elsie’s has all of the bases covered.

Lettuce Wrap Sandwich by Elsie's

Elsie’s also makes cucumber and pickle roll-ups which are fun mini bite-sized sandwiches. It’s sushi-style so you can eat the pickle or cucumber roll-up sandwiches with chopsticks! So cute and perfect for parties for any occasion.

Cucumber Roll-Ups by Elsie's

Have I piqued your interest in pickle sandwiches? You need to try these. Visit their store at 803 White Horse Pike in Haddon Township. Pro-tip: call before going to ensure they haven’t sold out for the day: 267-304-0266.

The Doyenne of Delicious in Philadelphia and South Jersey.

FRIED PICKLE POPPERS

FRIED PICKLE POPPERS

SPREAD THE LOVE
Share on FacebookPin on PinterestShare on YummlyEmail this to someone

As a “northerner”, there are a lot of foods that I feel it took me far too long to discover.  I’ve fallen in love with BBQ brisket, pecan pie, collard greens, fried green tomatoes, and chicken fried steak all within the past few years.

Fried Pickle Poppers.  These cheese-stuffed fried pickles are way easier to make than the typical deep-fried pickle chips, and they're even tastier!  Also, Chipotle Mayo Dip = delicious| hostthetoast.com

There’s no denying that there’s some delicious dishes to be had down south, but one really surprised me as a New Jersey native:  Fried Pickles.

Fried Pickles sounded gross to me when I first heard about them, but in the spirit of trying anything once (especially anything fried), I gave them a try in North Carolina a few years back.  Oh my.

close

Fried Pickle Poppers.  These cheese-stuffed fried pickles are way easier to make than the typical deep-fried pickle chips, and they're even tastier!  The Chipotle Mayo Dip brings them over the top, but they're a great appetizer even without it! | hostthetoast.com

Snooki from Jersey Shore called eating fried pickles “a life-changing experience”, and while Snooki and I don’t exactly have a history of shared sentiments, I’ve got to agree with her on that one.

Life. Changing.

It’s not an exaggeration.

They were tangy, crispy, crunchy, and not nearly as heavy and oily as a lot of fried foods.  Fried Pickles stole my heart that day, and I can’t even begin to tell you how excited I was when I saw Fried Pickles on a menu in NJ for the first time.

Fried Pickle Poppers.  These cheese-stuffed fried pickles are way easier to make than the typical deep-fried pickle chips, and they're even tastier!  The Chipotle Mayo Dip brings them over the top, but they're a great appetizer even without it! | hostthetoast.com

I’ve become a biiiit of a Fried Pickle fanatic.

So why has it taken me so long to make Fried Pickles for the blog?  Well, I really hate deep frying, so I was trying to come up with an easier fry-method, and lets be serious, Fried Pickles the “regular way” have been done to death.

Fried Pickle Poppers.  These cheese-stuffed fried pickles are way easier to make than the typical deep-fried pickle chips, and they're even tastier!  The Chipotle Mayo Dip brings them over the top, but they're a great appetizer even without it! | hostthetoast.com

I had to get creative, so naturally my mind went to cheese.  Cheese-Stuffed Fried Pickles.

FRIED PICKLE POPPERS.  Have you ever imagined a more perfect finger food?

Fried Pickle Poppers.  These cheese-stuffed fried pickles are way easier to make than the typical deep-fried pickle chips, and they're even tastier!  The Chipotle Mayo Dip brings them over the top, but they're a great appetizer even without it! | hostthetoast.com

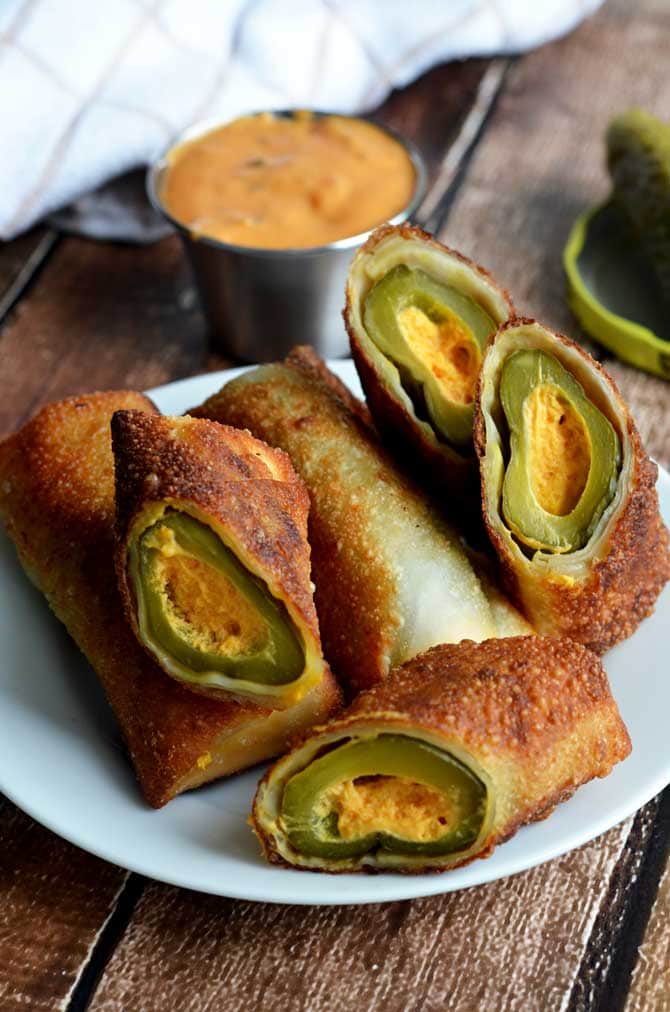
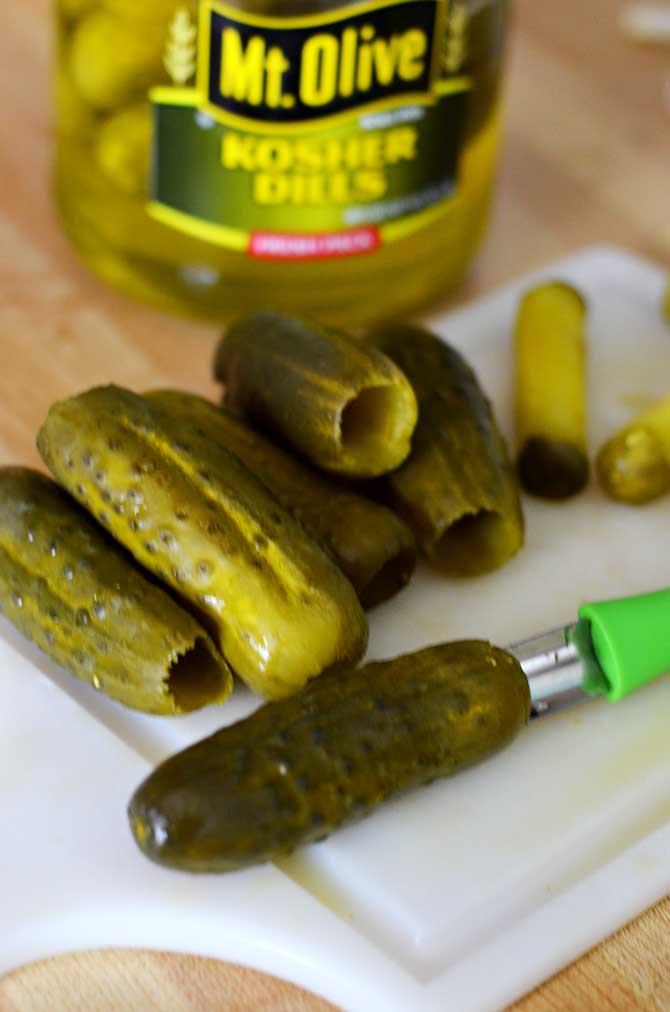
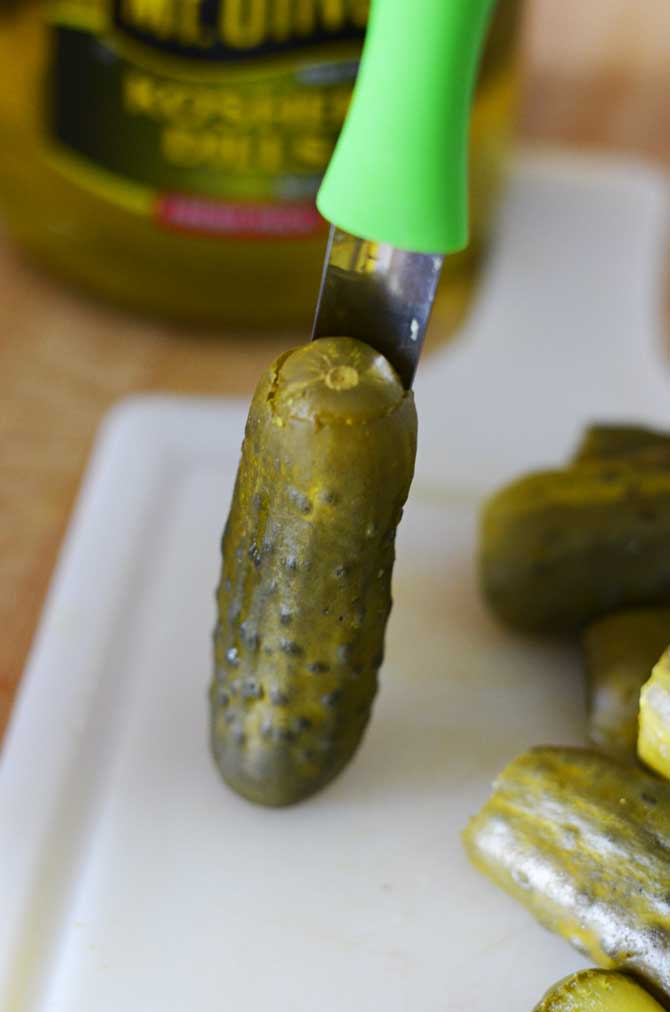
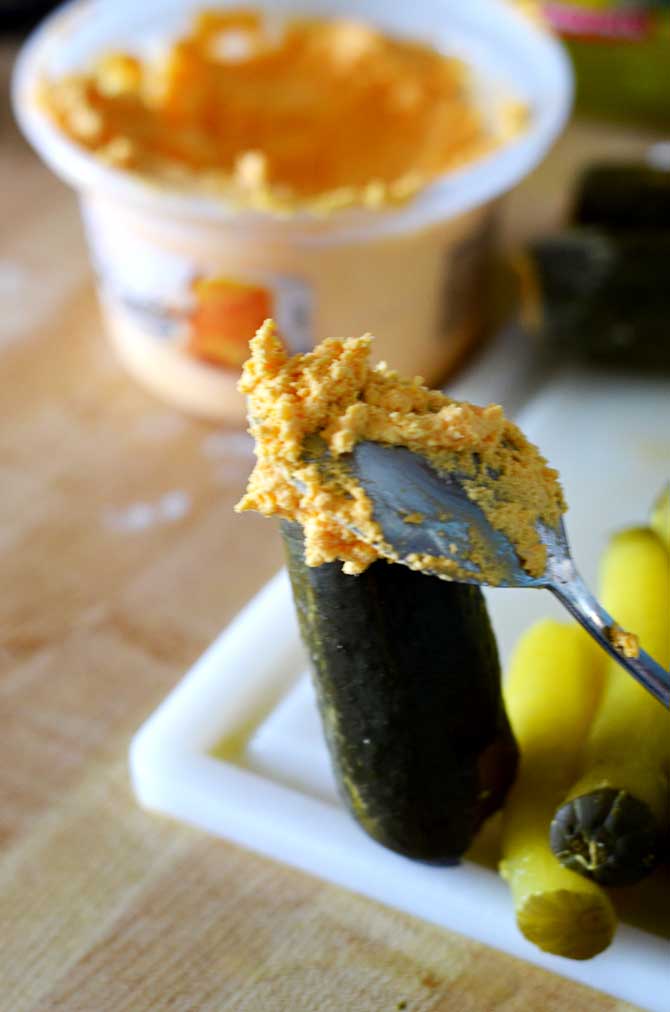
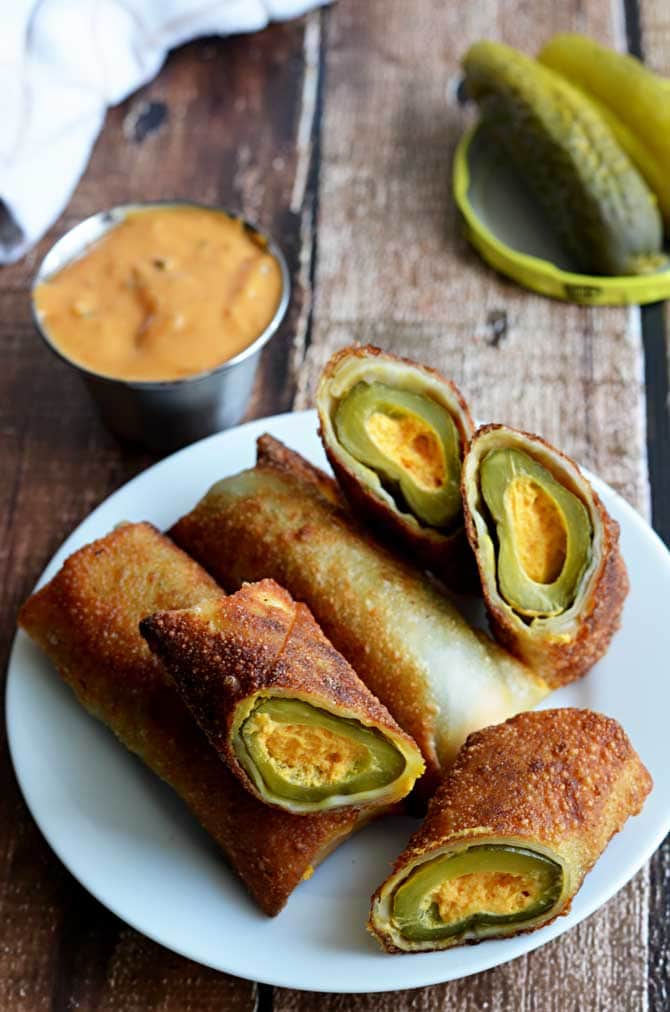
I used an apple corer to cut out the insides of kosher dills.  Then, I spooned cheddar & horseradish pub cheese into the opening (pimento cheese would be great here too), and tried my best not to eat all of the cheesy pickles as they were.

Fried Pickle Poppers.  These cheese-stuffed fried pickles are way easier to make than the typical deep-fried pickle chips, and they're even tastier!  The Chipotle Mayo Dip brings them over the top, but they're a great appetizer even without it! | hostthetoast.com

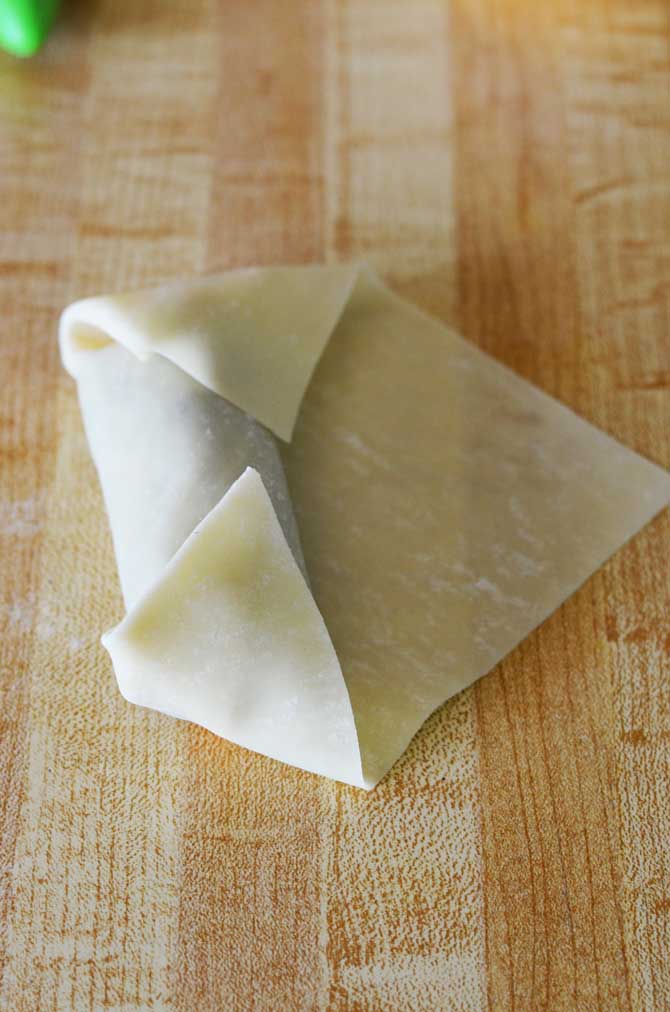
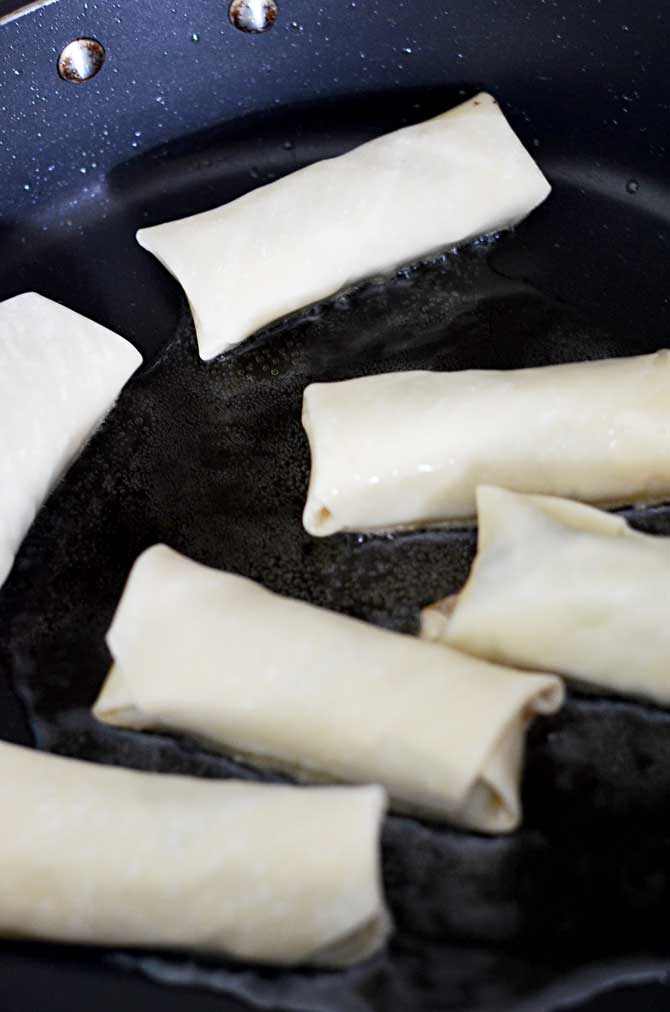
Then I took egg roll wrappers and rolled the pickles up in them, and pan fried them until golden brown on all sides.

Fried Pickle Poppers.  These cheese-stuffed fried pickles are way easier to make than the typical deep-fried pickle chips, and they're even tastier!  The Chipotle Mayo Dip brings them over the top, but they're a great appetizer even without it! | hostthetoast.com

They rested briefly on a wire rack to cool as I hovered over them, rubbing my hands in anticipation.

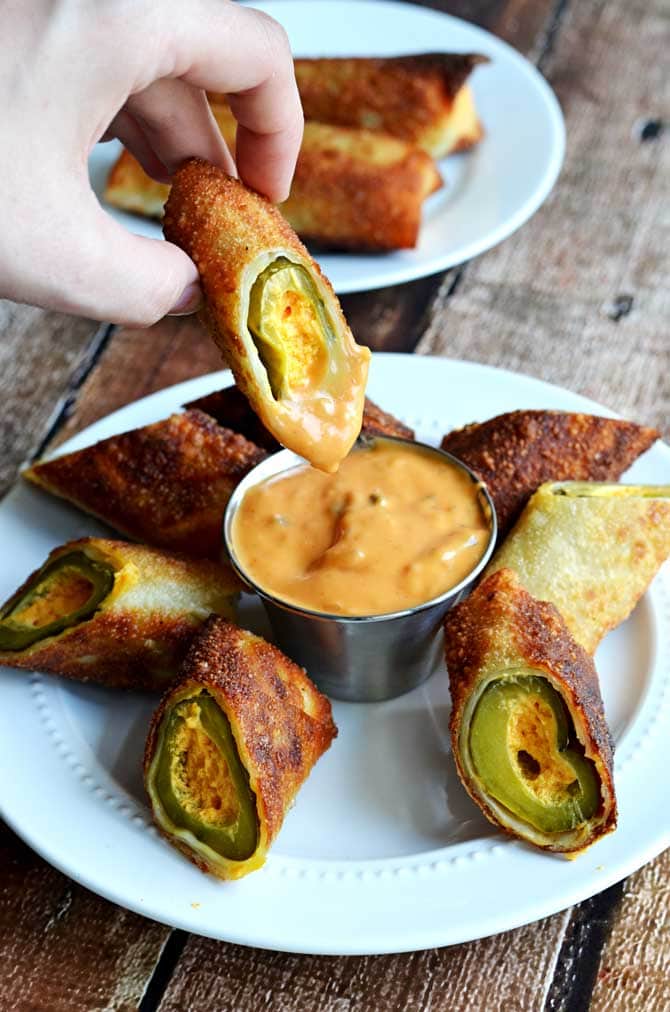
Finally, I cut the Fried Pickle Poppers in half and dipped them in Chipotle Mayo before scarfing them down, and I have to say, they were even better than the Fried Pickle Chips I was used to ordering.

Fried Pickle Poppers.  These cheese-stuffed fried pickles are way easier to make than the typical deep-fried pickle chips, and they're even tastier!  The Chipotle Mayo Dip brings them over the top, but they're a great appetizer even without it! | hostthetoast.com

Not to mention, these make amazing appetizers for parties, get-togethers, or watching sporting events.  These Fried Pickle Poppers were eaten while watching a World Cup game, and they will be made again for the Super Bowl this year (and many times in between that).  Make them once and you’ll be just as obsessed as I am!

Fried Pickle Poppers


  • Author: Morgan
  •  Prep Time: 15 mins
  •  Cook Time: 5 mins
  •  Total Time: 20 minutes
  •  Yield: 6 1x
SCALE 

INGREDIENTS

FOR THE FRIED PICKLE POPPERS:

  • 6 kosher dill pickles
  • 1 cup cheddar & horseradish pub cheese (pimento cheese or even softened cream cheese would also work well here)
  • 6 egg roll wrappers
  • Oil, for pan-frying

FOR THE CHIPOTLE MAYO DIP:

  • 3/4 cup mayonnaise
  • 1 tablespoon lime juice (about 1 lime)
  • 1 chipotle pepper in adobo sauce, chopped
  • 1 garlic clove, chopped
  • ½ teaspoon kosher salt

INSTRUCTIONS

  1. Using an apple corer, remove the centers of the pickles. To do this, stand the pickle straight up, twist the corer to break the pickle skin, and then push it down until you reach the opposite end of the pickle. Twist and pull towards you to remove the inside of the pickle. You can discard these centers or save them to use in relish, macaroni salad, potato salad, or tartar sauce.
  2. Spoon the pub cheese into the cored pickle, pressing it in until the pickle is full. You will want to hold your thumb against the opposite end of the pickle to make sure that the filling doesn’t squeeze out as you’re pushing more in.
  3. Once the pickles are filled with cheese, get out your egg roll wrappers. Take one pickle and lay it in the center of an egg roll wrapper. You want the egg roll wrapper to be angled so that it looks like a diamond, with the pickle going down the center.
  4. Fold over one side of the egg roll wrapper to cover the pickle. Then, fold up the bottom end and fold down the top end. Dip a finger in water and run it over the unfolded side of the wrapper. Then, roll it up tightly. You should have a traditional egg roll shape now! Repeat with the remaining pickles.
  5. In a heavy-bottomed skillet, fill about 1/2″ high with oil and heat over medium-high heat. When the oil is hot, add in the pickles. Pan fry until golden brown all around, turning to cook evenly.
  6. Remove the pickles from heat and place on a rack or track to cool.
  7. As the pickles cool, add the Chipotle Mayo Dip ingredients in a food processor or blender and mix until well-combined.
  8. Serve the Fried Pickle Poppers warm with the Chipotle Mayo Dip.

KETO PICKLE POPPER RECIPE

KETO PICKLE POPPER RECIPE

Keto Pickle Popper Recipe

Follow, Like, Share!

With Football Season upon us, and epic tailgating parties and potlucks an eventuality you will want to make this recipe more than once this year. This Keto-friendly Pickle Popper Recipe will be a hit at the party, even among your non-Keto friends and family. This is a fun alternative to Jalapeno Poppers and Potato Skins, and the pickles and extra sodium will help you if you are experiencing muscle cramps or even the Keto Flu.

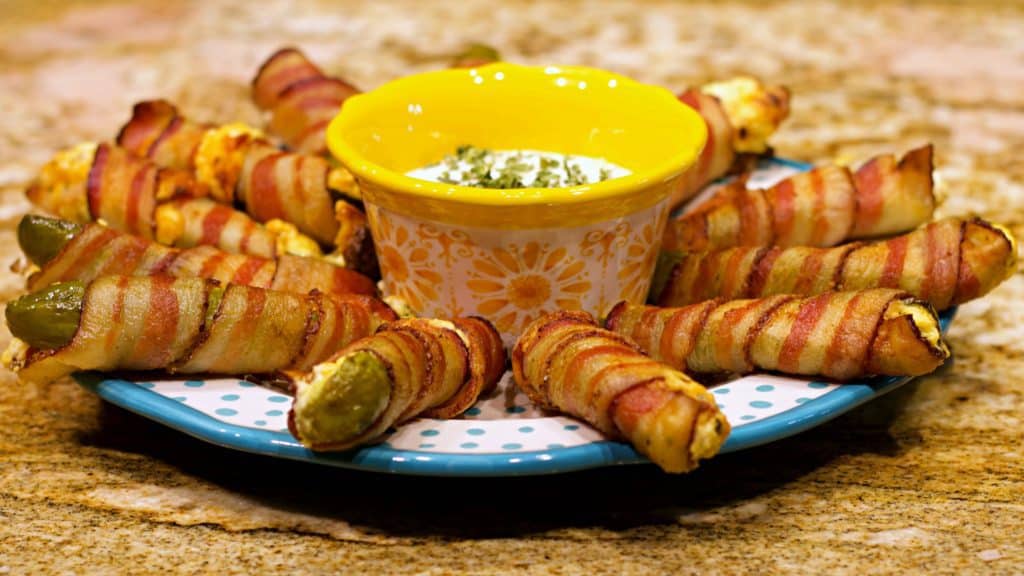
The only real trick to making these is to make sure that you bake them long enough to make the bacon crisp, and to use an oven rack on your pan. You will definitely want to listen to the advice to line the baking sheet with foil beforehand, as this will save you SO MUCH time later when it comes to cleaning the dishes later.

All of the ingredients used here in this Pickle Popper recipe should all be readily available at all grocery stores, which makes this one of the simplest recipes that we have produced to date. No hunting down obscure ingredients to prepare a fancy dish, you might even already have most of this at home. I recommend 3 of these per serving, but feel free to modify to your needs. The pickles seem to be way more filling the jalapeños in this dish, and I found myself eating 5 before being completely stuffed.

For dipping sauce these pair well with your typical Ranch Dressing, or also some Sour Cream. You can really make whatever dipping sauce you feel like, even a spicy one to kick things up a notch. I even highly encourage some creativity with this recipe, and I can see people also opting to put diced jalapeños into the cream cheese mixture instead of the chives, and simple modifications like that.

Keto Pickle Popper Recipe Wide

KETO PICKLE POPPER RECIPE

Ease of Preparation: Easy

Prep Time: 15 Minutes

Cooking Time: 40 Minutes

Total Time: 65 Minutes

Keto Pickle Popper Recipe Nutrition Label

INGREDIENTS

  • 6 Medium Dill Pickles (Halved)
  • 6 Ounces Cream Cheese
  • 3/4 Cup Cheddar Cheese (Shredded)
  • 1 TBSP Chives
  • 1/2 TBSP Red Pepper Flakes
  • 12 Slices Smoked Bacon
  • Favorite Dipping Sauces

INSTRUCTIONS

  1. Pre-Heat the Oven to 400*F.
  2. Slice your Pickles in half, and gut out the seedy section in the middle using a teaspoon.
  3. Pat the Pickles dry in all around with a paper towel to remove excess moisture.
  4. In a Large Mixing Bowl combine the Cream Cheese, Cheddar Cheese, Chives, and Red Pepper Flakes, and blend with a hand mixer for about 1 minute.
  5. Fill the middle of the pickles with the Cream Cheese Mixture, I find this easiest to do by hand, but feel free to use a pastry bag if you want to get fancy.
  6. On a Large Baking Sheet cover it with Aluminum Foil, and a Wire Baking Rack. This will all allow for even cooking and easy cleanup later. If you don’t have a baking rack you wont really get the bottoms of the poppers equally crispy, but they will still turn out okay.
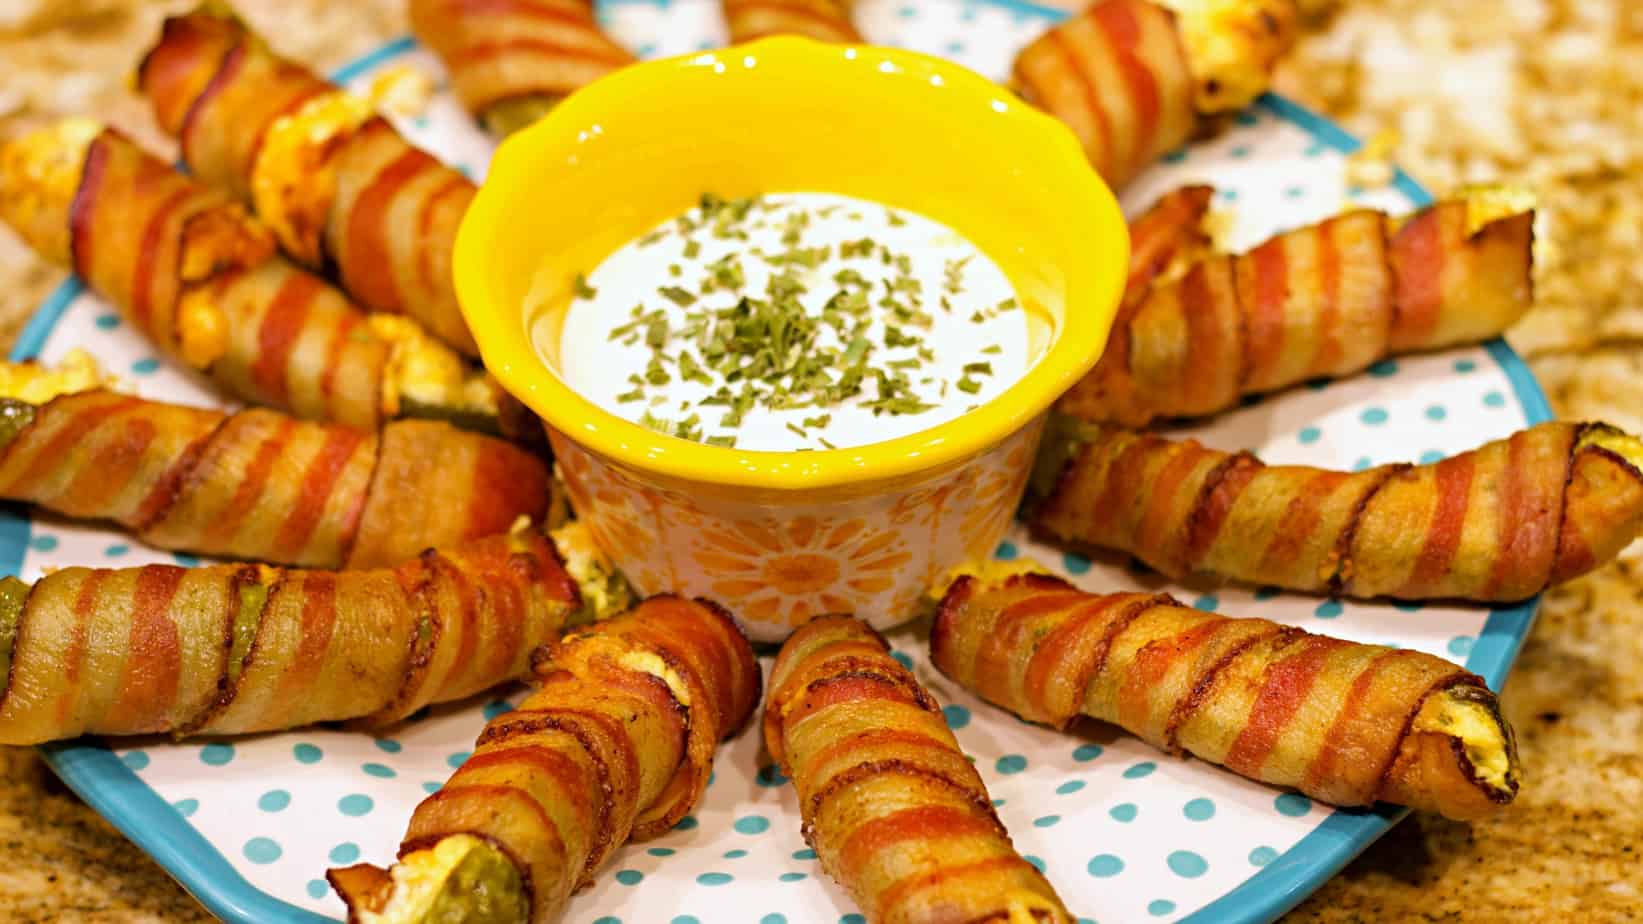
  7. Wrap the pickles in bacon in a spiral manner and place onto the Baking Rack.
  8. Bake in the oven at 400*F for about 35-40 minutes, but this will vary depending on how long it takes for your particular bacon to crisp up. I use Kirkland Signature Bacon from Costco, which is rather thick and that may add to the baking time in my case.
  9. Remove from the oven and allow to cool on the counter for about 5 minutes before serving.
  10. Pair with your favorite dipping sauces.

SPECIAL NOTE: Go wild with this one and experiment with different ingredients in the Cream Cheese mixture.

Summary

recipe image
Recipe Name
Keto Pickle Popper Recipe
Author Name
Keto Daily
Published On
Preparation Time
Cook Time
Total Time
Average Rating
1star1star1stargraygray Based on 15 Review(s)